Configuring SonarQube
Published on July 28th, 2021Introduction
Roadie supports both SonarCloud hosted and self-hosted SonarQube instances. To access SonarQube secured in private networks you are able to use the Broker connection for secure communication between Roadie and SonarQube instance. In order to use the SonarQube plugin, Roadie needs an API token to communicate with SonarQube's APIs.
NB: This token must be a User token as detailed in their docs .
If you are using hosted SonarCloud as your SonarQube provider you only need set a secret token value into SONARCLOUD_API_TOKEN secret. These are set within backstage at the following url: https://<tenant-name>.roadie.so/administration/sonarqube. You can generate the token from URL https://sonarcloud.io/account/security .
If you are using self-hosted SonarQube plugin or want more control over the SonarQube plugin you can use the SonarQube settings page to set up needed configurations.
At a Glance
| Prerequisites | Configuration Data:
|
| Considerations | Multi-Instance is supported through multiple broker configuration blocks. |
| Supported Environments | ☒ Private Network via Broker ☒ Internet Accessible via IP Whitelist ☒ Cloud Hosted |
SonarQube entity configuration
Step 1: Add SonarQube UI Components
The SonarQube plugin provides two UI components you can add to your entity pages:
EntitySonarQubeCard
Displays SonarQube metrics such as coverage, bugs, and vulnerabilities for a single component. Add this to component pages.
SonarQube Related Entities Overview
A content page that displays different information depending on the entity type:
- Group or System pages: Lists all catalog entities owned by that entity that have the
sonarqube.org/project-keyannotation. - Component pages: Lists the component's owning Group/System that have the
sonarqube.org/project-keyannotation.
Note: For detailed metrics on component pages, use the EntitySonarQubeCard instead.
Step 2: Annotate your entities
Add the following annotation to entities to link a project to the entity:
metadata:
  annotations:
    sonarqube.org/project-key: [YOUR_PROJECT_KEY]
Alternatively, if you have multiple named SonarQube instances configured, you can add the name of the connection as follows. Please read below for an explanation of named SonarQube instance configurations.
metadata:
  annotations:
    sonarqube.org/project-key: [YOUR_INSTANCE_NAME]/[YOUR_PROJECT_KEY]
Connection Configuration Steps
Step 1: Create an API token
In order for the Backstage integration to work we must first generate our api key. For SonarQube you can generate this from your profile page under security.
Step 2: Store the credentials and SonarQube URL in Roadie
Visit https://<tenant-name>.roadie.so/administration/sonarqube and enter the token value from above into SONARQUBE_TOKEN. Note that the secret name is different from default, no-config setup of hosted SonarCloud. If you are using a brokered connection to your self-hosted and secure SonarQube instance, you can input a placeholder value to the secret, since it will be overridden on the broker client.
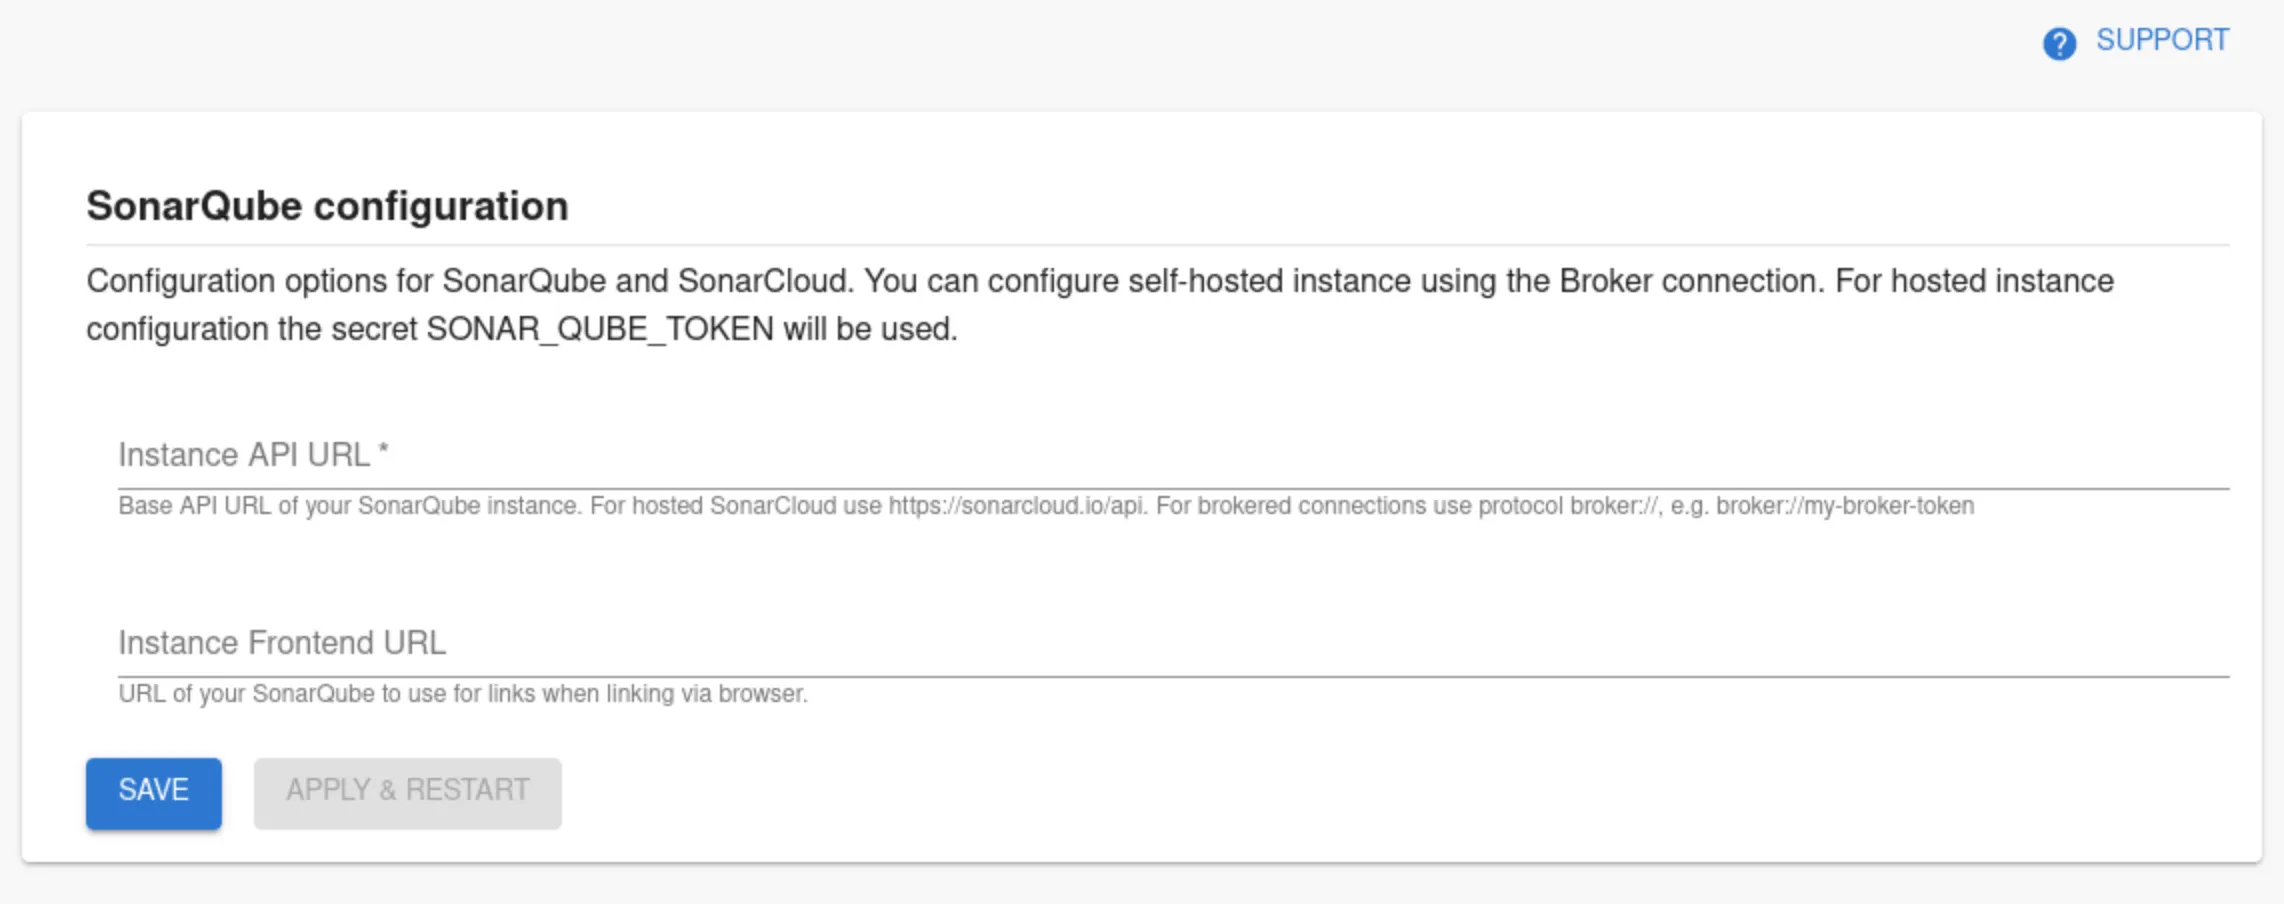
Step 3: Configure SonarQube URLs
Visit https://<tenant-name>.roadie.so/administration/sonarqube and configured the base URL of you SonarQube instance and (optionally) the frontend URL so proper linking can be generated by the plugin. If you are using a brokered connection to your self-hosted and secure SonarQube instance you can use protocol broker:// to point to the correct endpoint, e.g. broker://my-broker-token. The frontend URL should be pointing to the actual URL of the instance, e.g. https://mysonarqube.internaldomain.com.
You can configure multiple SonarQube instance connections by clicking the "Add Item" button. Any additional connection you configure will require a unique name. The name can be used to identify the SonarQube instance when using the sonarqube.org/project-key annotation.
Step 4: (Optional, for brokered connections) Setup Broker client configuration
If you are contacting SonarQube via a brokered connection, you need to run the docker conatiner below:
docker run \
  --env SONARQUBE_INSTANCE_URL=https://<sonarqube> \
  --env BROKER_TOKEN=sonarqube \
  --env BROKER_SERVER_URL=https://<tenant-name>.broker.roadie.so \
  roadiehq/broker:sonarqube
The expected environment variables with this configuration are:
- Standard broker env vars.
SONARQUBE_INSTANCE_URL: The URL as it is visible to your deployed Broker client serviceSONARQUBE_TOKEN: SonarQube token generated in Step 1 above.
Advanced
You can also configure the broker client manually using an accept.json file.
Show accept.json
{
  "private": [
    {
      "method": "GET",
      "path": "/api/components/show",
      "origin": "${SONARQUBE_INSTANCE_URL}",
      "auth": {
        "scheme": "basic",
        "token": "${SONARQUBE_TOKEN}:"
      }
    },
    {
      "method": "GET",
      "path": "/api/metrics/search",
      "origin": "${SONARQUBE_INSTANCE_URL}",
      "auth": {
        "scheme": "basic",
        "token": "${SONARQUBE_TOKEN}:"
      }
    },
    {
      "method": "GET",
      "path": "/api/measures/component",
      "origin": "${SONARQUBE_INSTANCE_URL}",
      "auth": {
        "scheme": "basic",
        "token": "${SONARQUBE_TOKEN}:"
      }
    }
  ],
  "public": [
    {
      "method": "any",
      "path": "/*"
    }
  ]
}
For more information how to set up the Broker client and how to use configuration files, take a look at Broker documentation.