Set up the PagerDuty plugin
Published on August 26th, 2022Introduction
The PagerDuty Backstage plugin allows Roadie Backstage users to:
- See who is on call for a particular catalog Component.
- See if there are active incidents for a given catalog Component.
- Create new incidents from Backstage.
At a Glance
| Prerequisites | Configuration Data:
|
| Considerations | |
| Supported Environments | ☒ Private Network via Broker ☒ Internet Accessible via IP Whitelist ☒ Cloud Hosted |
Setting up the plugin:
1. Create an API token or an OAuth application.
Please follow the offical PagerDuty documentation to acquire the credentials that you would like to use:
ℹ️ The PagerDuty Backstage plugin allows users to create PagerDuty incidents from within Roadie. For this reason, the API key needs both read and write permissions to function correctly.
Copy the key that is created to your clipboard.
2. Store the credentials in Roadie
API Token
- Go to your tenant's
administration/pagerdutypage - Select
API Tokenas your Auth type - Save
- Apply & Restart

After the restart provide the PAGERDUTY_TOKEN secret just under the save buttons. Once these are set you can go to the next step.

ℹ️ Roadie accepts the token from PagerDuty unmodified.
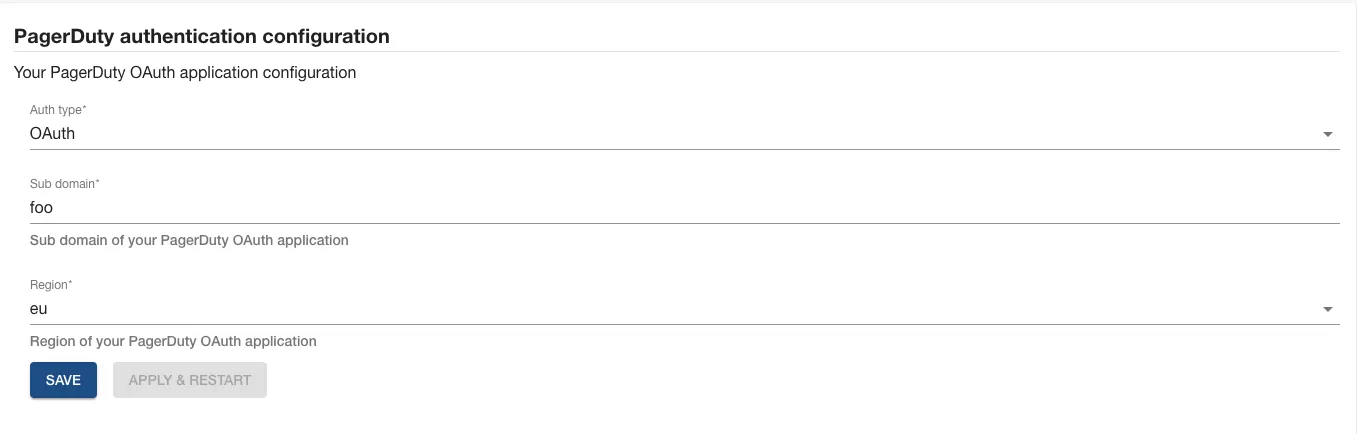
OAuth application
Your subdomain and region can be found in your pagerduty url. e.g: foo.eu.pagerduty.com
- Go to your tenant's
administration/pagerdutypage. - Select
OAuthas your Auth type - Fill in your application's subdomain
- Fill in your application's region
- Save
- Apply & Restart
After the restart provide the PD_CLIENT_ID and PD_CLIENT_SECRET secrets just under the save buttons. Once these are set you can go to the next step.

3. Add the PagerDuty annotation
Backstage requires a PagerDuty annotation on every component which will display the PagerDuty plugin. The plugin supports two different annotation keys:
pagerduty.com/integration-keypagerduty.com/service-id
For Tech Insights usages, Roadie uses the service-id annotation to identify the linking between an entity and a PagerDuty service.
This example shows how it might look on a Backstage component:
apiVersion: backstage.io/v1alpha1
kind: Component
metadata:
  name: sample-service
  title: Sample Service
  description: A sample service
  annotations:
    pagerduty.com/integration-key: <sample-service-integration-key>
    pagerduty.com/service-id: <sample-service-service-id>
spec:
  type: service
  owner: sample-team
  lifecycle: experimental
To generate the PagerDuty integration key, find a "Service" in the PagerDuty Service Directory and view the Integrations tab.
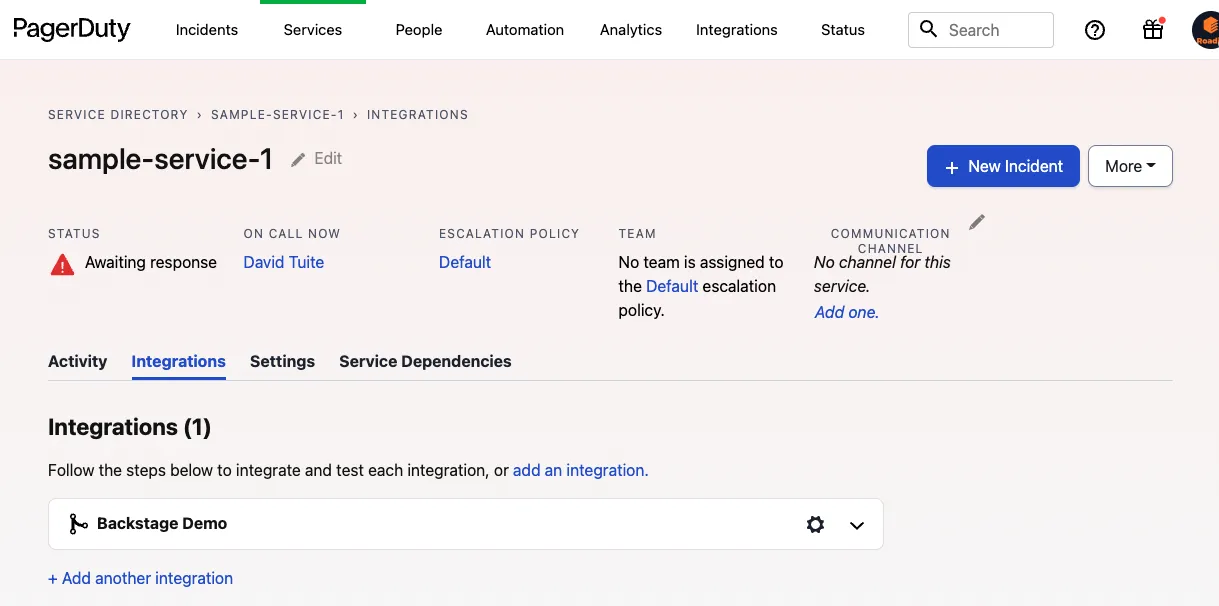
Click the Add an integration link. Choose Events API V2, and click the Add button.
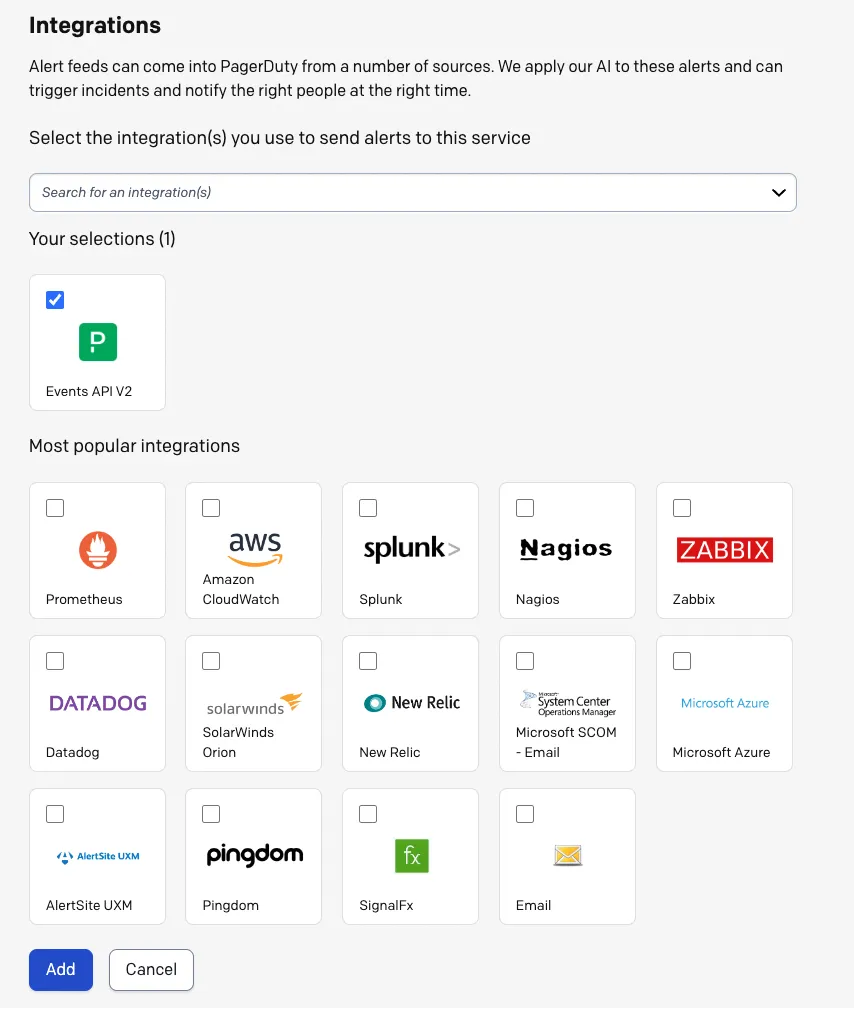
You should now be redirected back to the Integrations tab, and a new integration should have been created. You can edit the integration name to indicate that this is a Roadie Backstage integration.
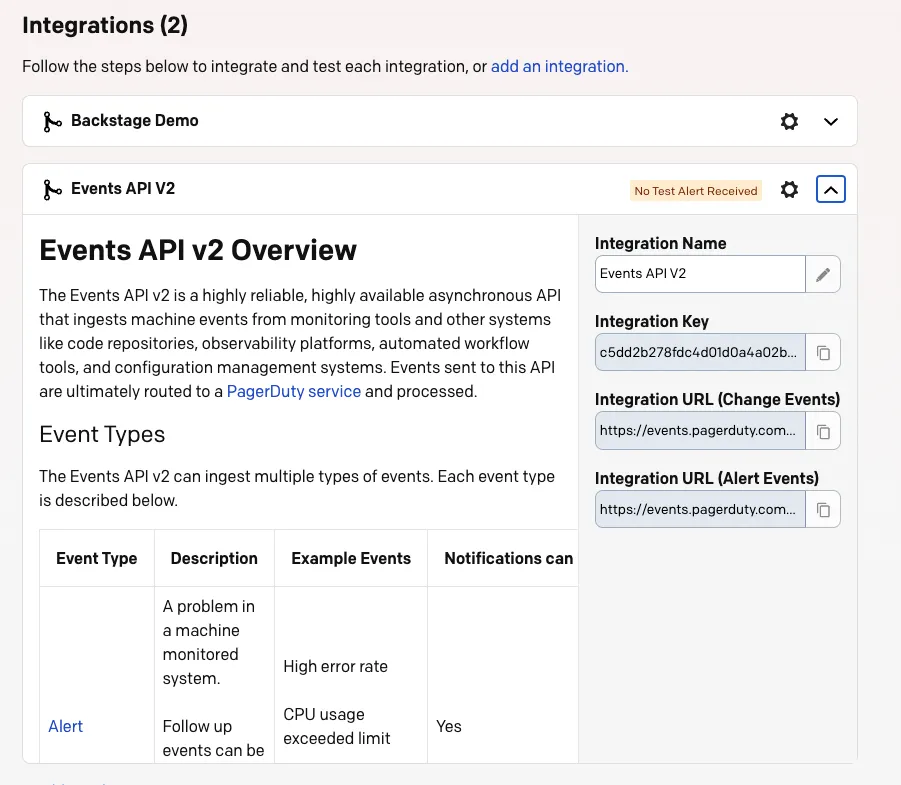
Copy the Integration Key and add it to the Component YAML.
apiVersion: backstage.io/v1alpha1
kind: Component
metadata:
  name: sample-service
  title: Sample Service
  description: A sample service
  annotations:
    pagerduty.com/integration-key: <sample-service-integration-key>
    pagerduty.com/service-id: <sample-service-service-id>
spec:
  type: service
  owner: sample-team
  lifecycle: experimental
Commit and merge this change and the Roadie Backstage PagerDuty plugin should begin working shortly afterwards.
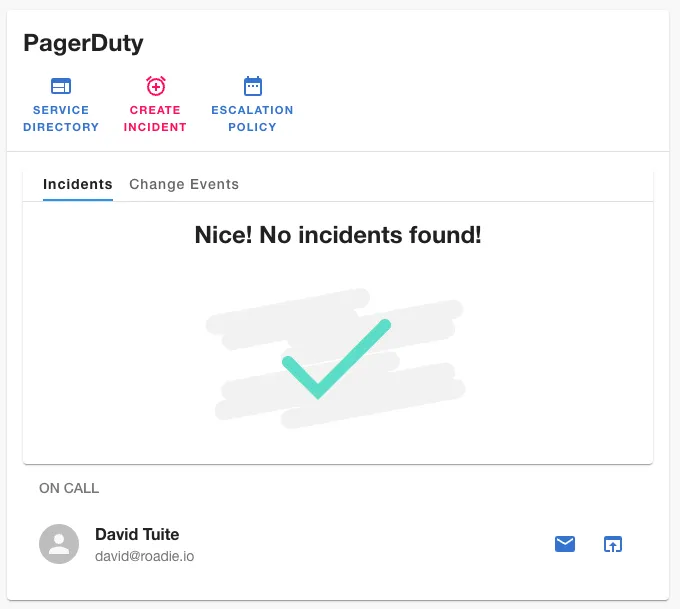
4. Add the PagerDuty card
Navigate to the component you have added the annotation for and add the PagerDuty card to the overview page.
5. Card information
The PagerDuty Backstage plugin allows Roadie Backstage users to:
- See who is on call for a particular catalog Component.
- See if there are active incidents for a given catalog Component.
- Create new incidents from Backstage.
6. (Optional) Use the PagerDuty home page card
The PagerDuty plugin also exposes a card that can be configured to be used on you Roadie home page. This plugin card can be configured either with an integration key or a service id and it will display data for the chosen target. You can add the card in through the cog button on the home page and configure either the service id or integration key using the wrench button on the card itself.