Allure Plugin
Published on April 4th, 2022Introduction
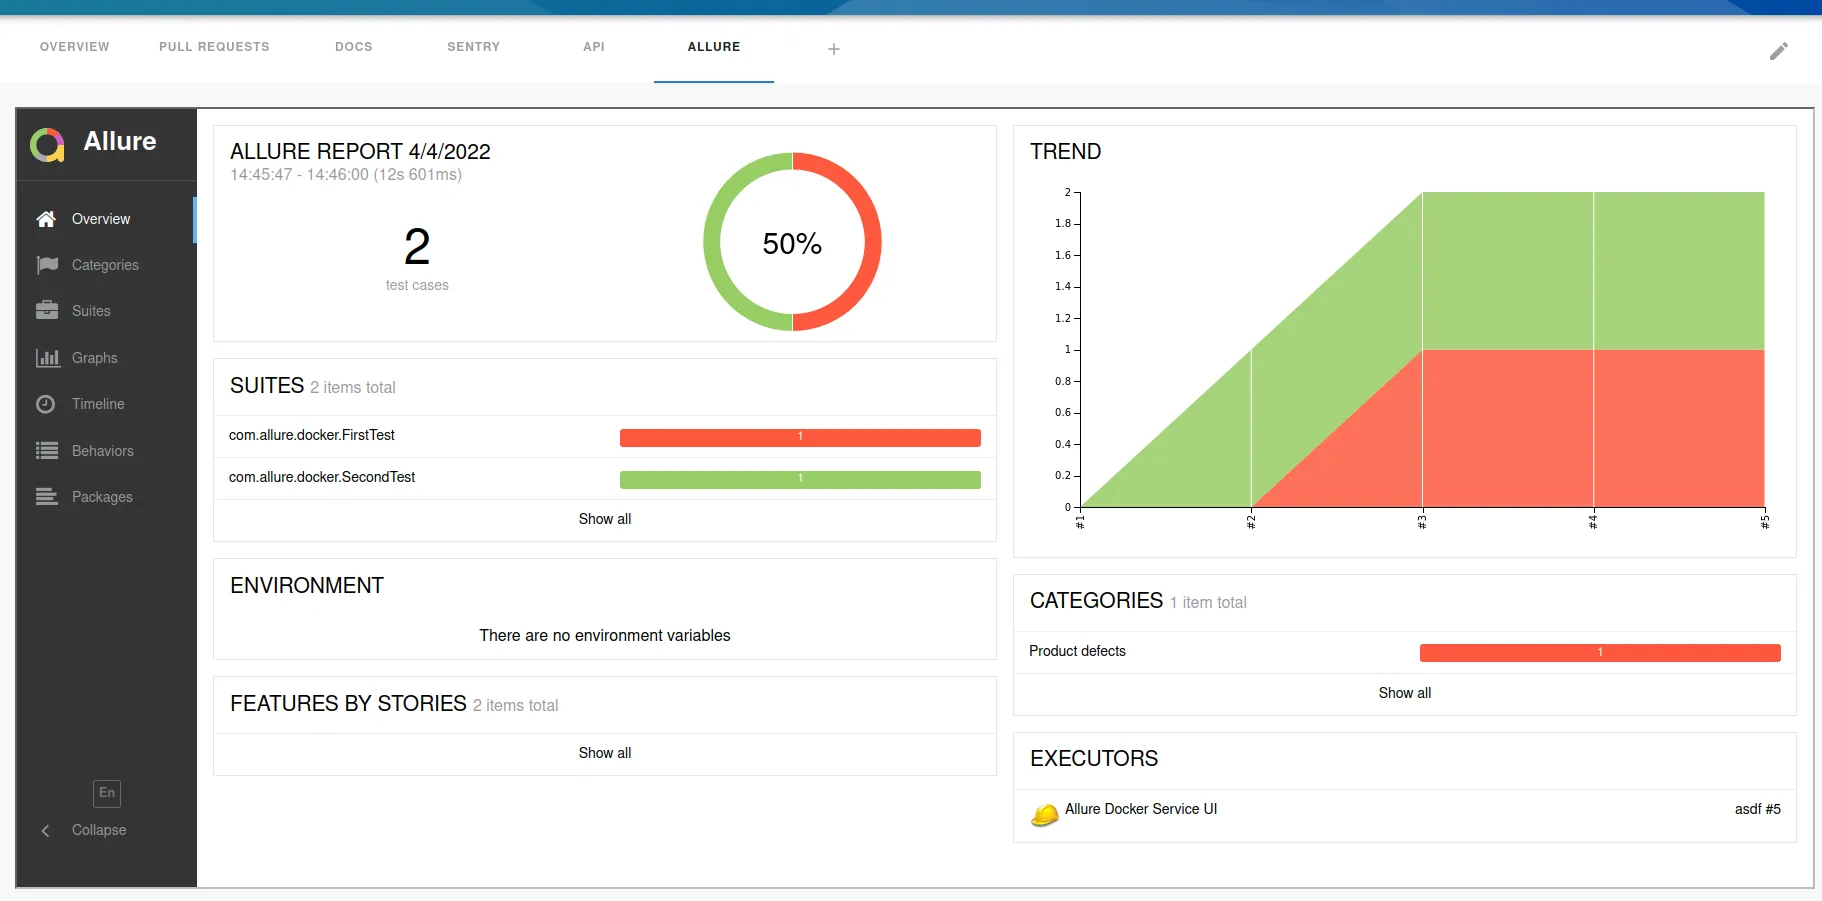
The Allure plugin can display the Allure reports of the component in your Roadie Backstage catalog.
This page explains how to configure it in Roadie Backstage.
At a Glance
| Prerequisites | 1. You must be an admin in Roadie. By default, all users are admins. Learn how to designate certain users as admins here. 2. Your Allure reports must be accessible by Roadie backend instances. To allow list Roadie access you can check our IPs here. |
| Considerations | |
| Supported Environments | ☐ Private Network via Broker ☐ Internet Accessible via IP Whitelist ☒ Cloud Hosted |
Step 1: Save your hosted Allure report URL into Roadie
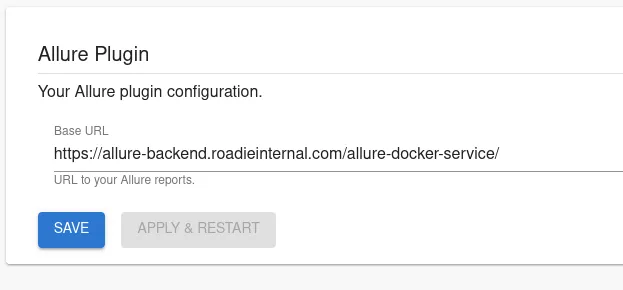
Navigate to Administration > Settings > Allure and set up the URL where your Allure reports are hosted. Note that this URL needs to be accessible from Roadie backend.
Step 2: Modify your catalog-info.yaml files to contain a reference to the Allure project
yaml
# catalog-info.yaml
---
metadata:
  annotations:
    qameta.io/allure-project: projectname
Step 3: Add Allure Report UI component to your Roadie instance
The plugin provides an UI component with a name EntityAllureReportContent which can be added as a tab into your Roadie instance. Learn how to do that in here.
Useful information
The Allure plugin constructs the displayable path based on the base URL defined in Roadie config section and project id defined in the catalog manifest file. The final URL requested by the plugin looks like this:
text
<Base URL>/projects/<Project Id>/reports/latest/index.html