How to create a Proxy
Accessing your own self-hosted solutions and third party product APIs securely from Roadie is crucial in ensuring security of data and systems. Roadie provides two kinds of proxy services to handle these scenarios.
With the Proxy feature, there’s an easier way. In this tutorial, we’re going to:
- Securely store credentials in the Roadie.
- Configure a basic and authenticated Proxy to access a third party API.
As we go through this process, you’ll learn:
- How to add user credentials to the Roadie.
- How to configure the basic and advanced settings of the Proxy.
Create a new Authenticated Proxy
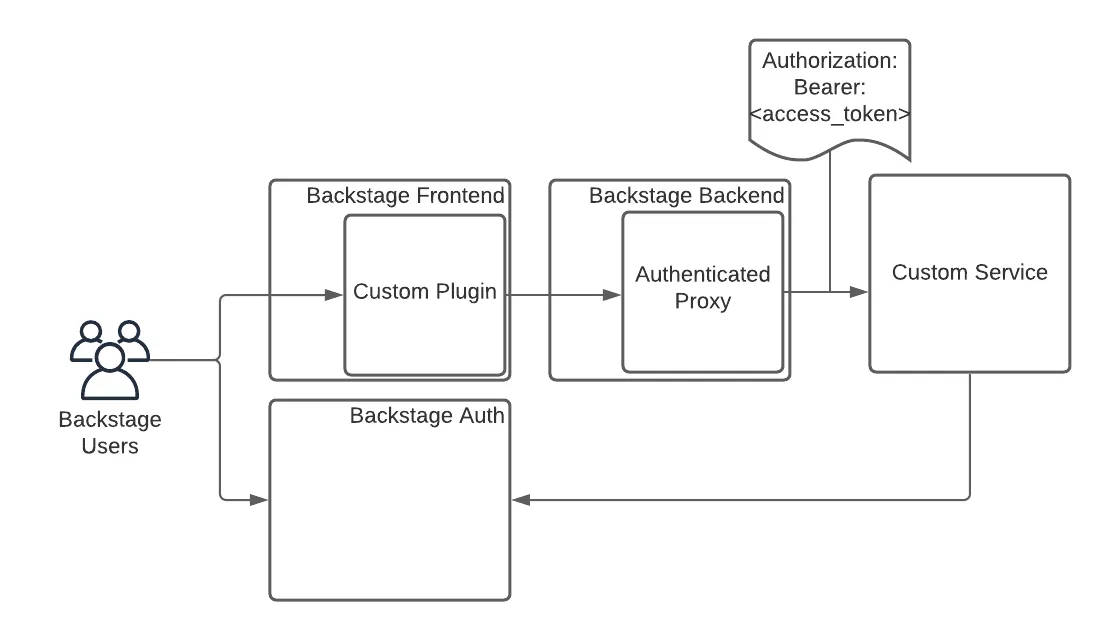
Roadie provides a custom proxy service that can be configured to pass an access token for authentication by the service it is configured to send to.
This gives a custom plugin a way to interact with your own service. That service can authenticate the incoming requests from Roadie.

Setup
Step 1. Configure the Proxy
You can navigate to /administration/settings/authenticatedProxy. Click add item to add a new proxy.

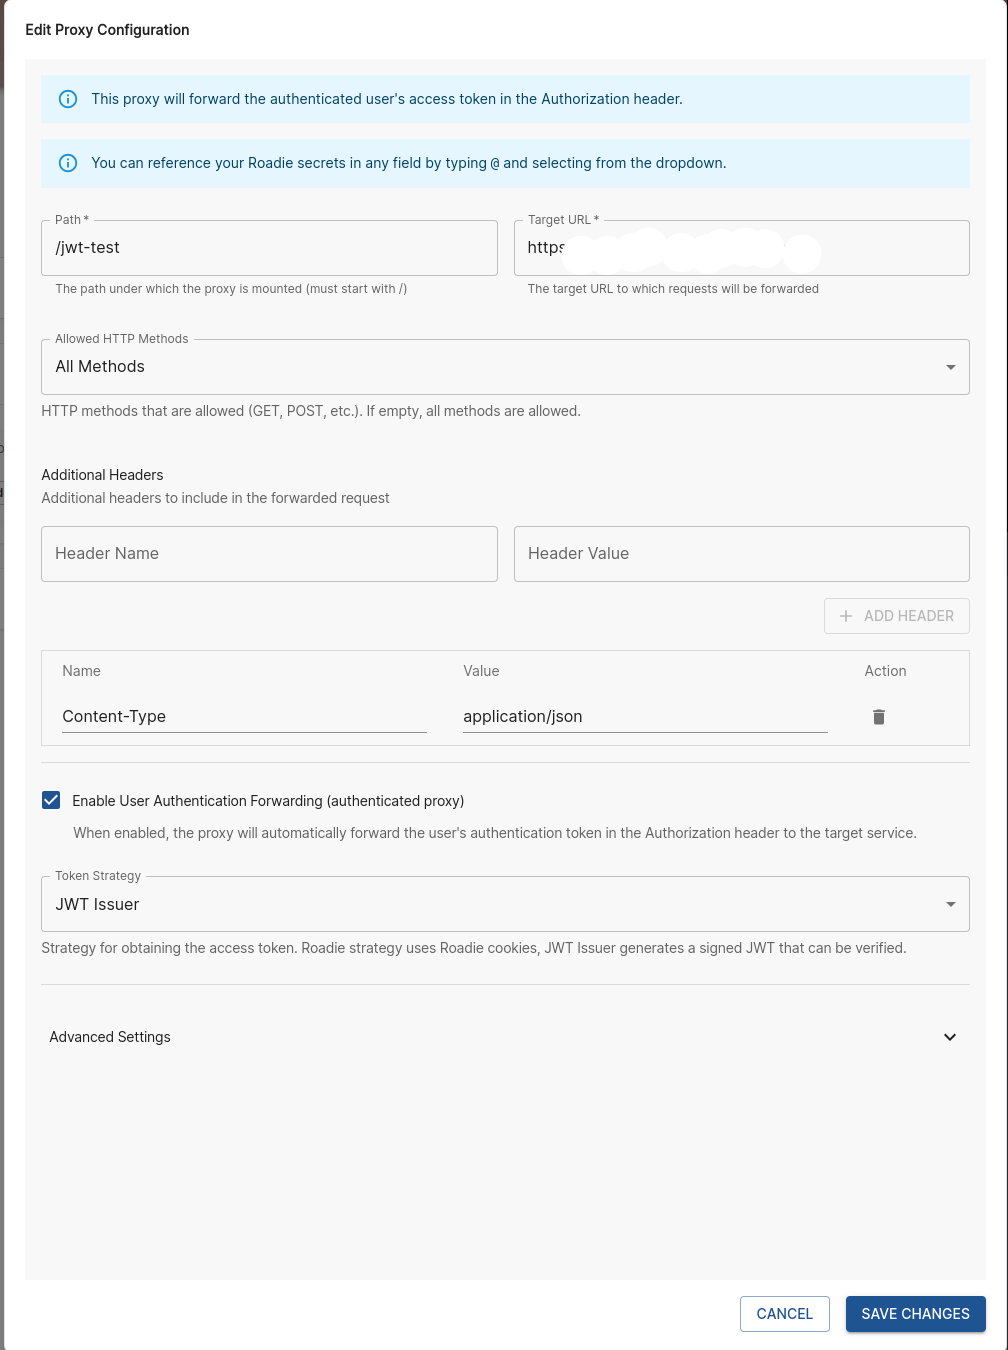
Enter a Path (e.g. /my-api) and a target API (e.g. https://my-api.com/api).
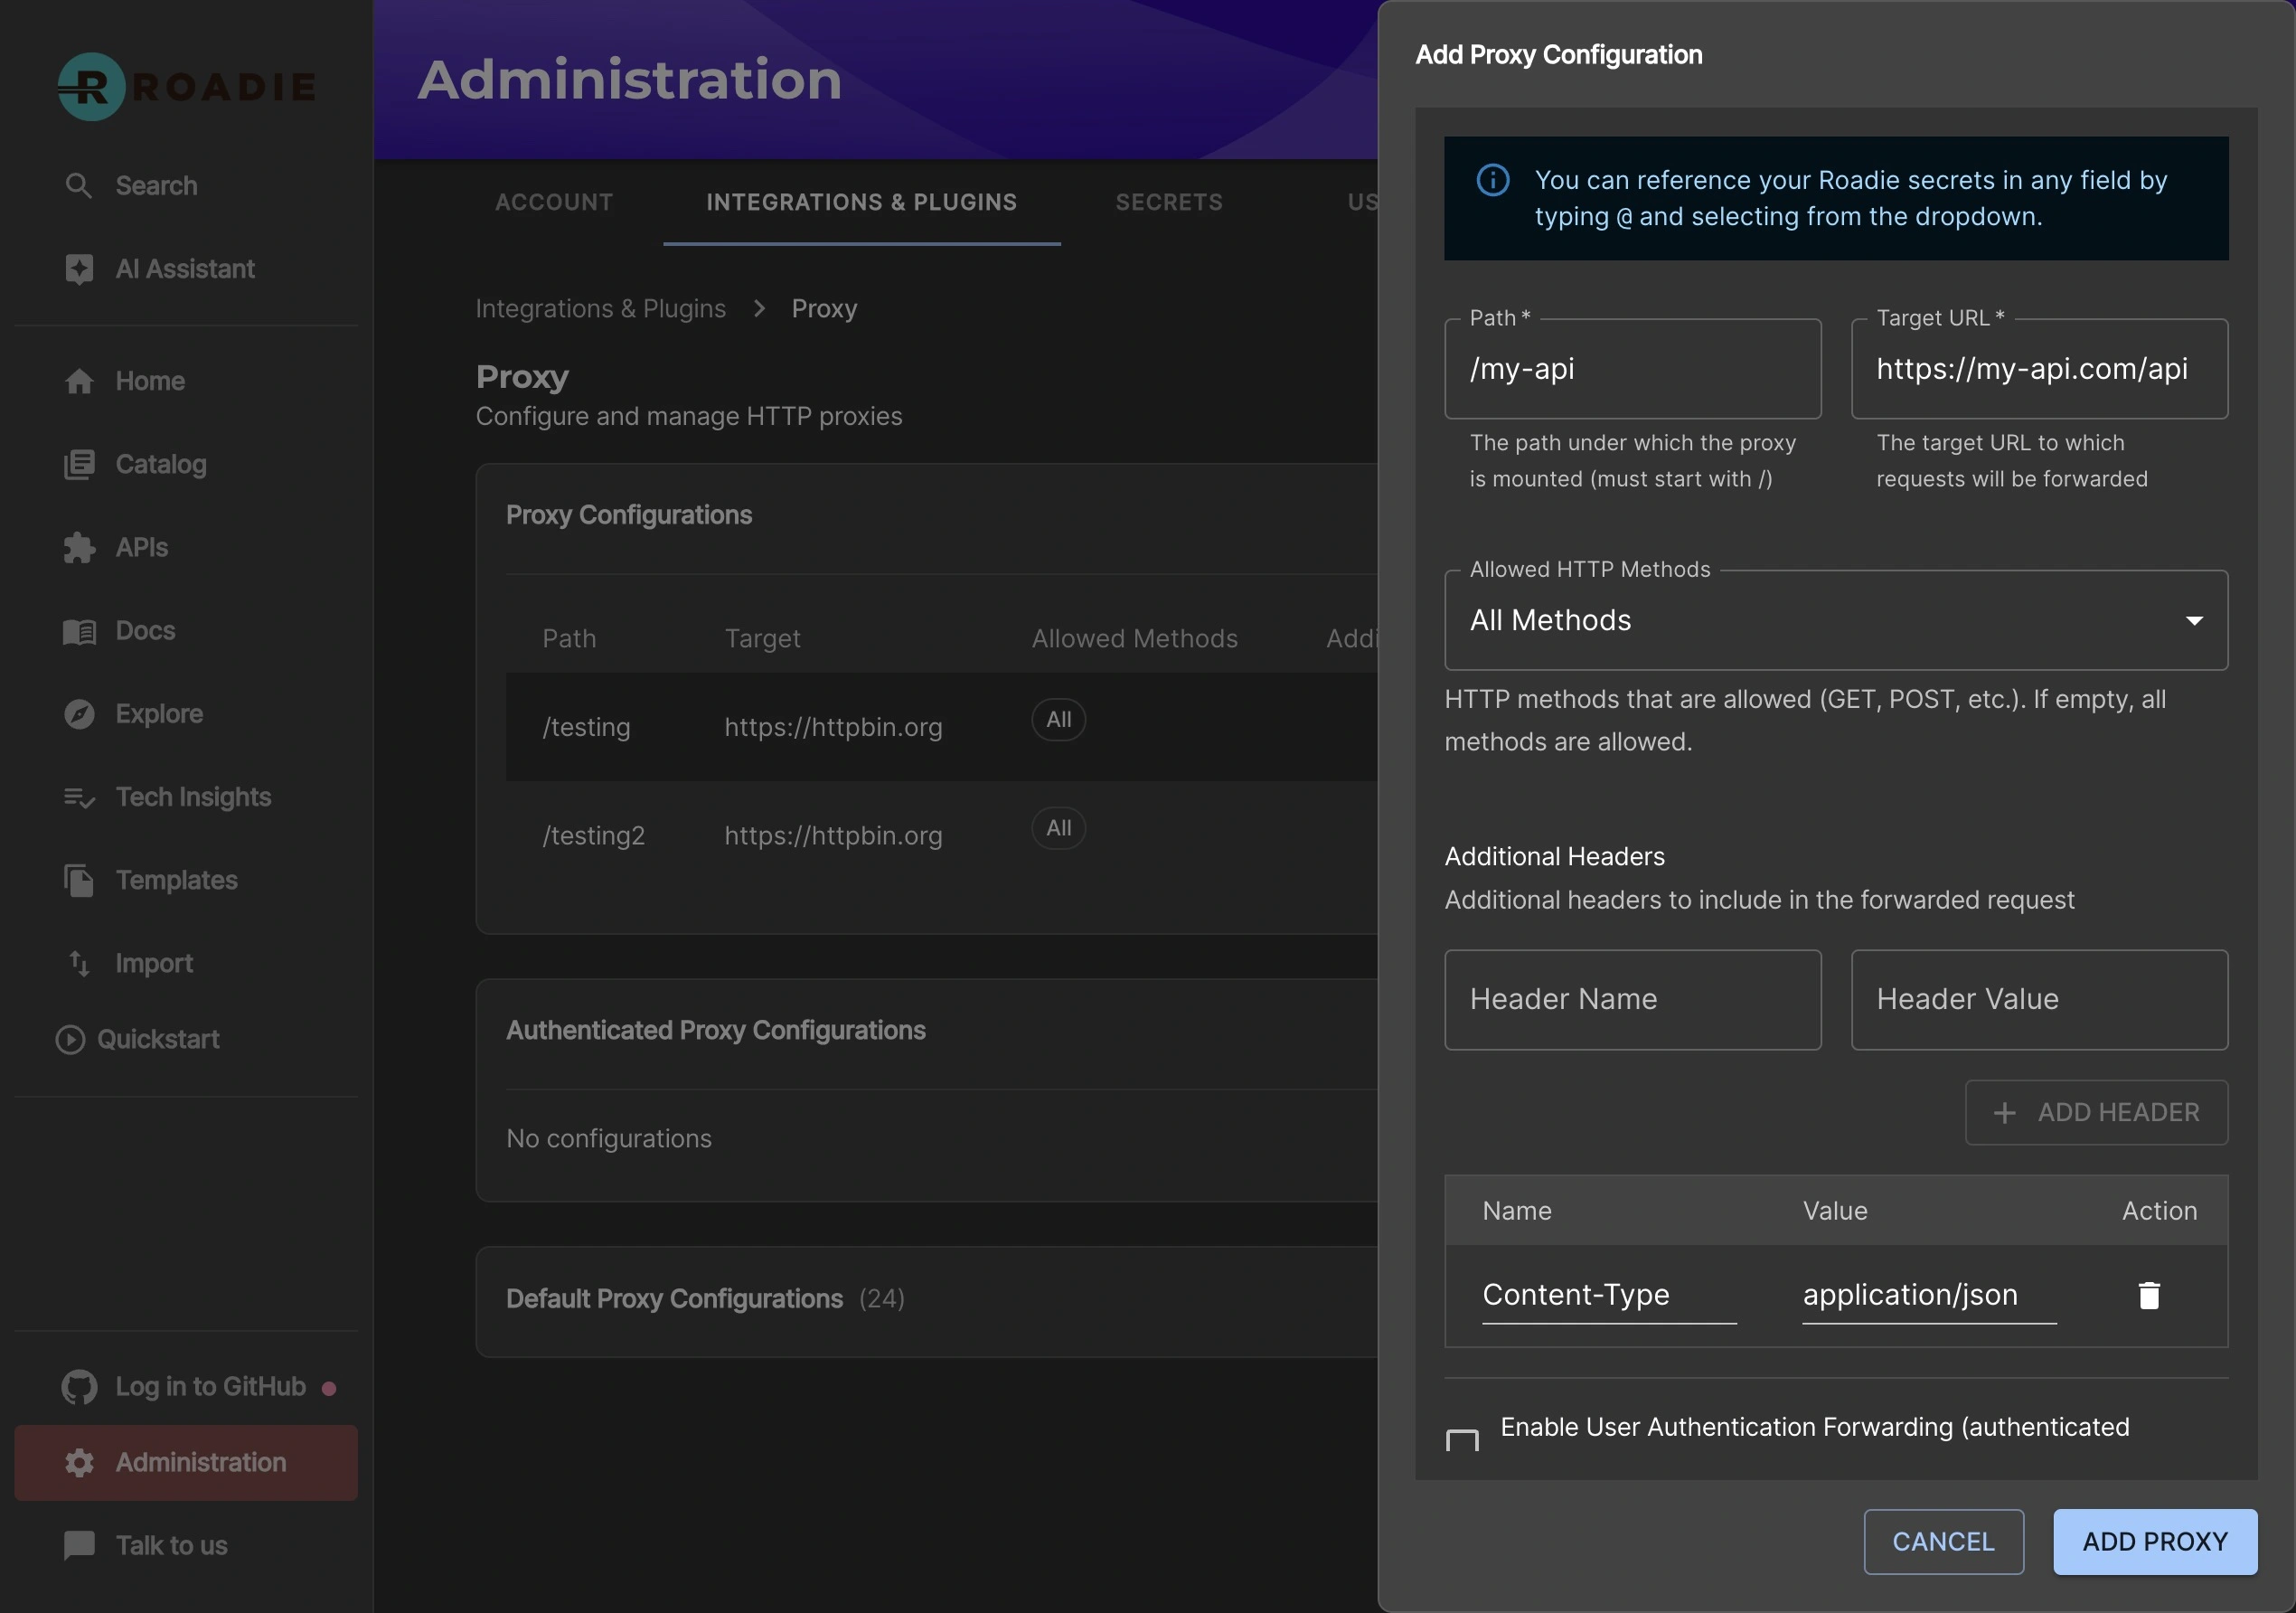
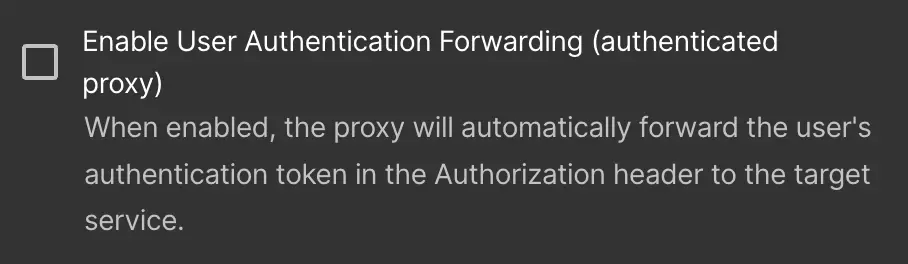
Click the "Enable User Authentication Forwarding" checkbox to create an authenticated proxy.
Click save and Apply and Restart and wait for the restart. It can take up to about two minutes for the change to be applied.
Step 2 Calling the API
You can call this API from the Roadie window context in a browser via a Custom Roadie plugin:
fetch('/api/authenticated-proxy/my-api');
Step 3 Authenticate the Request
The API configured in the Authenticated proxy target will receive a token in the authorization header. Roadie supports two methods for validating this token:
Method 1: JWT Validation using JWKS (Recommended)
The request includes a signed JWT that can be validated using the public keys exposed at your tenant's JWKS endpoint:
https://<tenant>.roadie.so/.well-known/jwks.json
Replace <tenant> with your Roadie tenant name.
Most programming languages have libraries that can automatically fetch and validate JWTs using a JWKS endpoint:
// Node.js example using jsonwebtoken and jwks-rsa
const jwt = require('jsonwebtoken');
const jwksClient = require('jwks-rsa');
const client = jwksClient({
jwksUri: 'https://<tenant>.roadie.so/.well-known/jwks.json'
});
function getKey(header, callback) {
client.getSigningKey(header.kid, function (err, key) {
const signingKey = key.publicKey || key.rsaPublicKey;
callback(null, signingKey);
});
}
// Extract token from Authorization header
const token = req.headers.authorization.replace('Bearer ', '');
// Verify the JWT
jwt.verify(token, getKey, {algorithms: ['RS256']}, function (err, decoded) {
if (err) {
return res.status(401).send('Unauthorized');
}
// Token is valid, decoded contains the user information
console.log(decoded.sub); // User entity
});
Once validated, the decoded JWT will contain claims about the authenticated user:
{
"sub": "user:default/my-user-entity",
"aud": "https://<tenant>.roadie.so",
"exp": 1765980447,
"iat": 1765979547,
"iss": "https://roadie.io"
}
Method 2: Token Introspection via Userinfo Endpoint
Alternatively, you can send the token to the Roadie Authentication system to retrieve information about the logged in Roadie user:
curl --request GET \
--url 'https://auth.roadie.io/userinfo' \
--header 'Authorization: Bearer {ACCESS_TOKEN}' \
--header 'Content-Type: application/json'
This will return the identity as follows:
{
"sub": "248289761003",
"name": "John Doe",
...
"updated_at": "1556845729"
}