
Backstage is a great framework for building Internal Developer Portals. However, having a successful Dev Portal requires more than simply standing it up. Independently of whether you go with self-hosted or managed Backstage, the task of onboarding entities into your Software Catalog will be primarily in your hands.
Most Dev Portals rely on putting metadata files (YAML, Terraform, etc) into the services so they can be updated by the teams that work on them. The more friction you cut from the process of creating these metadata files, the easier it is to convince people to create them.
Backstage’s Scaffolder can make the software onboarding a one-click experience that gives Developers a chance to try out your Dev Portal and easily add their own services to the Catalog.
In this article, I’ll show you how you can write a software template that prompts the user to tell you about their service and opens a PR on their repository. Once that PR is merged, the Catalog will pick up the service automatically (if you have auto-discovery enabled).
Onboard your service with a few clicks
The experience you’re after will let developers onboard their service by filling in a few inputs. The Scaffolder then takes care of generating a catalog-info.yaml file and opening a PR against the service's repository.
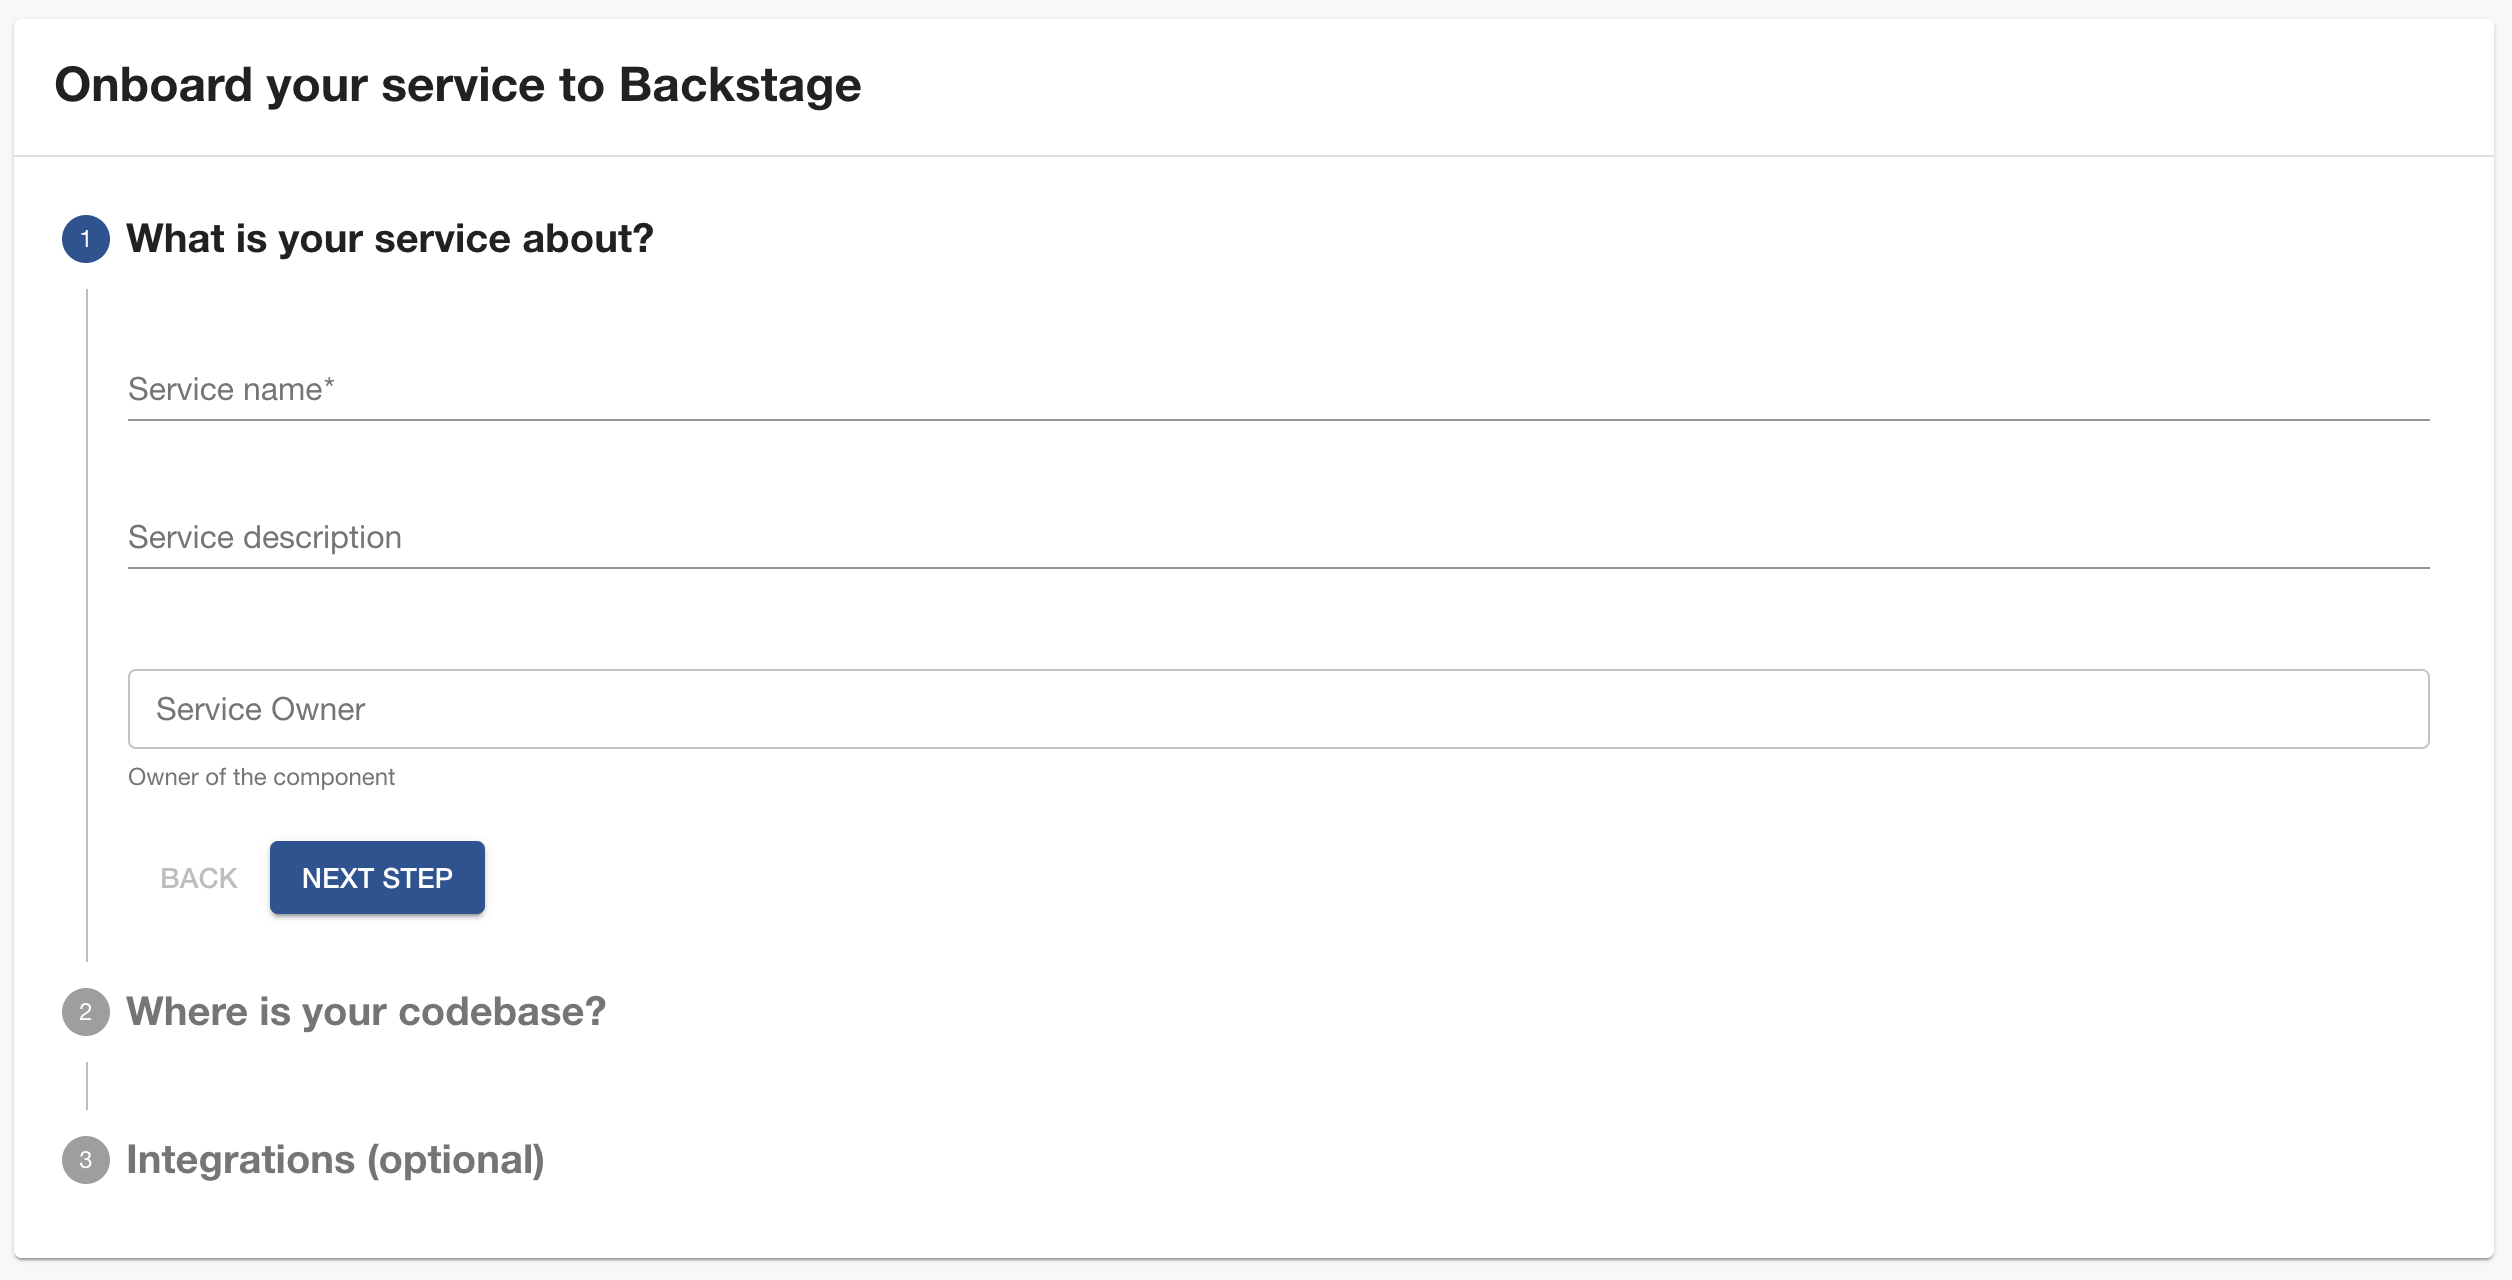
In the first section, you’ll ask for basic information about the service. In the second one, you’ll prompt the user to locate their repo and associate it with an owner. And finally, you’ll ask for integration details such as ArgoCD’s app name or PagerDuty integration key.
Once you’ve collected all the information, your software template will generate a catalog-info.yaml file and open a PR against the service’s repository.
Writing a scaffolder template
Software templates in Backstage have two parts: parameters and steps. The parameters define the inputs you want from the user. The steps are actions—like cloning a repo, editing files, creating an AWS secret, or making an HTTP request —that are run one after the other. In this section, you’ll learn more about how both parts can be implemented for an onboard service template.
Defining parameters
Let’s take care first of the parameters. Parameters can be organized into sections in the UI. In this case, you want to have three sections: one for general information, one for the repository, and one for additional details. Here’s what the code that describes the form presented in the last section could look like:
parameters:
    - title: What is your service about?
      required:
        - name
      properties:
        name:
          title: Service name
          type: string
          description: Human readable name. We'll generate a dasherized version from it.
        description:
          title: Service description
          type: string
        owner:
          title: Service Owner
          type: string
          description: Owner of the component
          ui:field: OwnerPicker
          ui:options:
            catalogFilter:
              kind: Group
    - title: Where is your codebase?
      required:
        - repoSlug
      properties:
        repoHost:
          type: string
          default: github.com
          ui:widget: hidden
        repoOwner:
          title: Repository owner
          type: string
          default: roadiehq
          enum: ['roadiehq', 'jorgelainfiesta']
        repoSlug:
          title: Repository slug
          type: string
    - title: Integrations (optional)
      properties:
        argoAppName:
          title: Argo CD App Name
          type: string
        pagerdutyKey:
          title: PagerDuty integration key
          type: string
The input that the Scaffolder generates is based on the type of property. In all of the cases in this example, we’re dealing with strings but you can also specify numbers, objects, and arrays. You can also specify a component to be rendered as the input with ui:field. For a comprehensive list of these options check out our Scaffolder documentation.
You’ll want to customize the form according to how you want to register services in your Catalog. For example, I’m hard coding the repository’s host and providing two owner options but you may have more than one host option. You could also use a dynamic select box to ease up the selection of repositories.
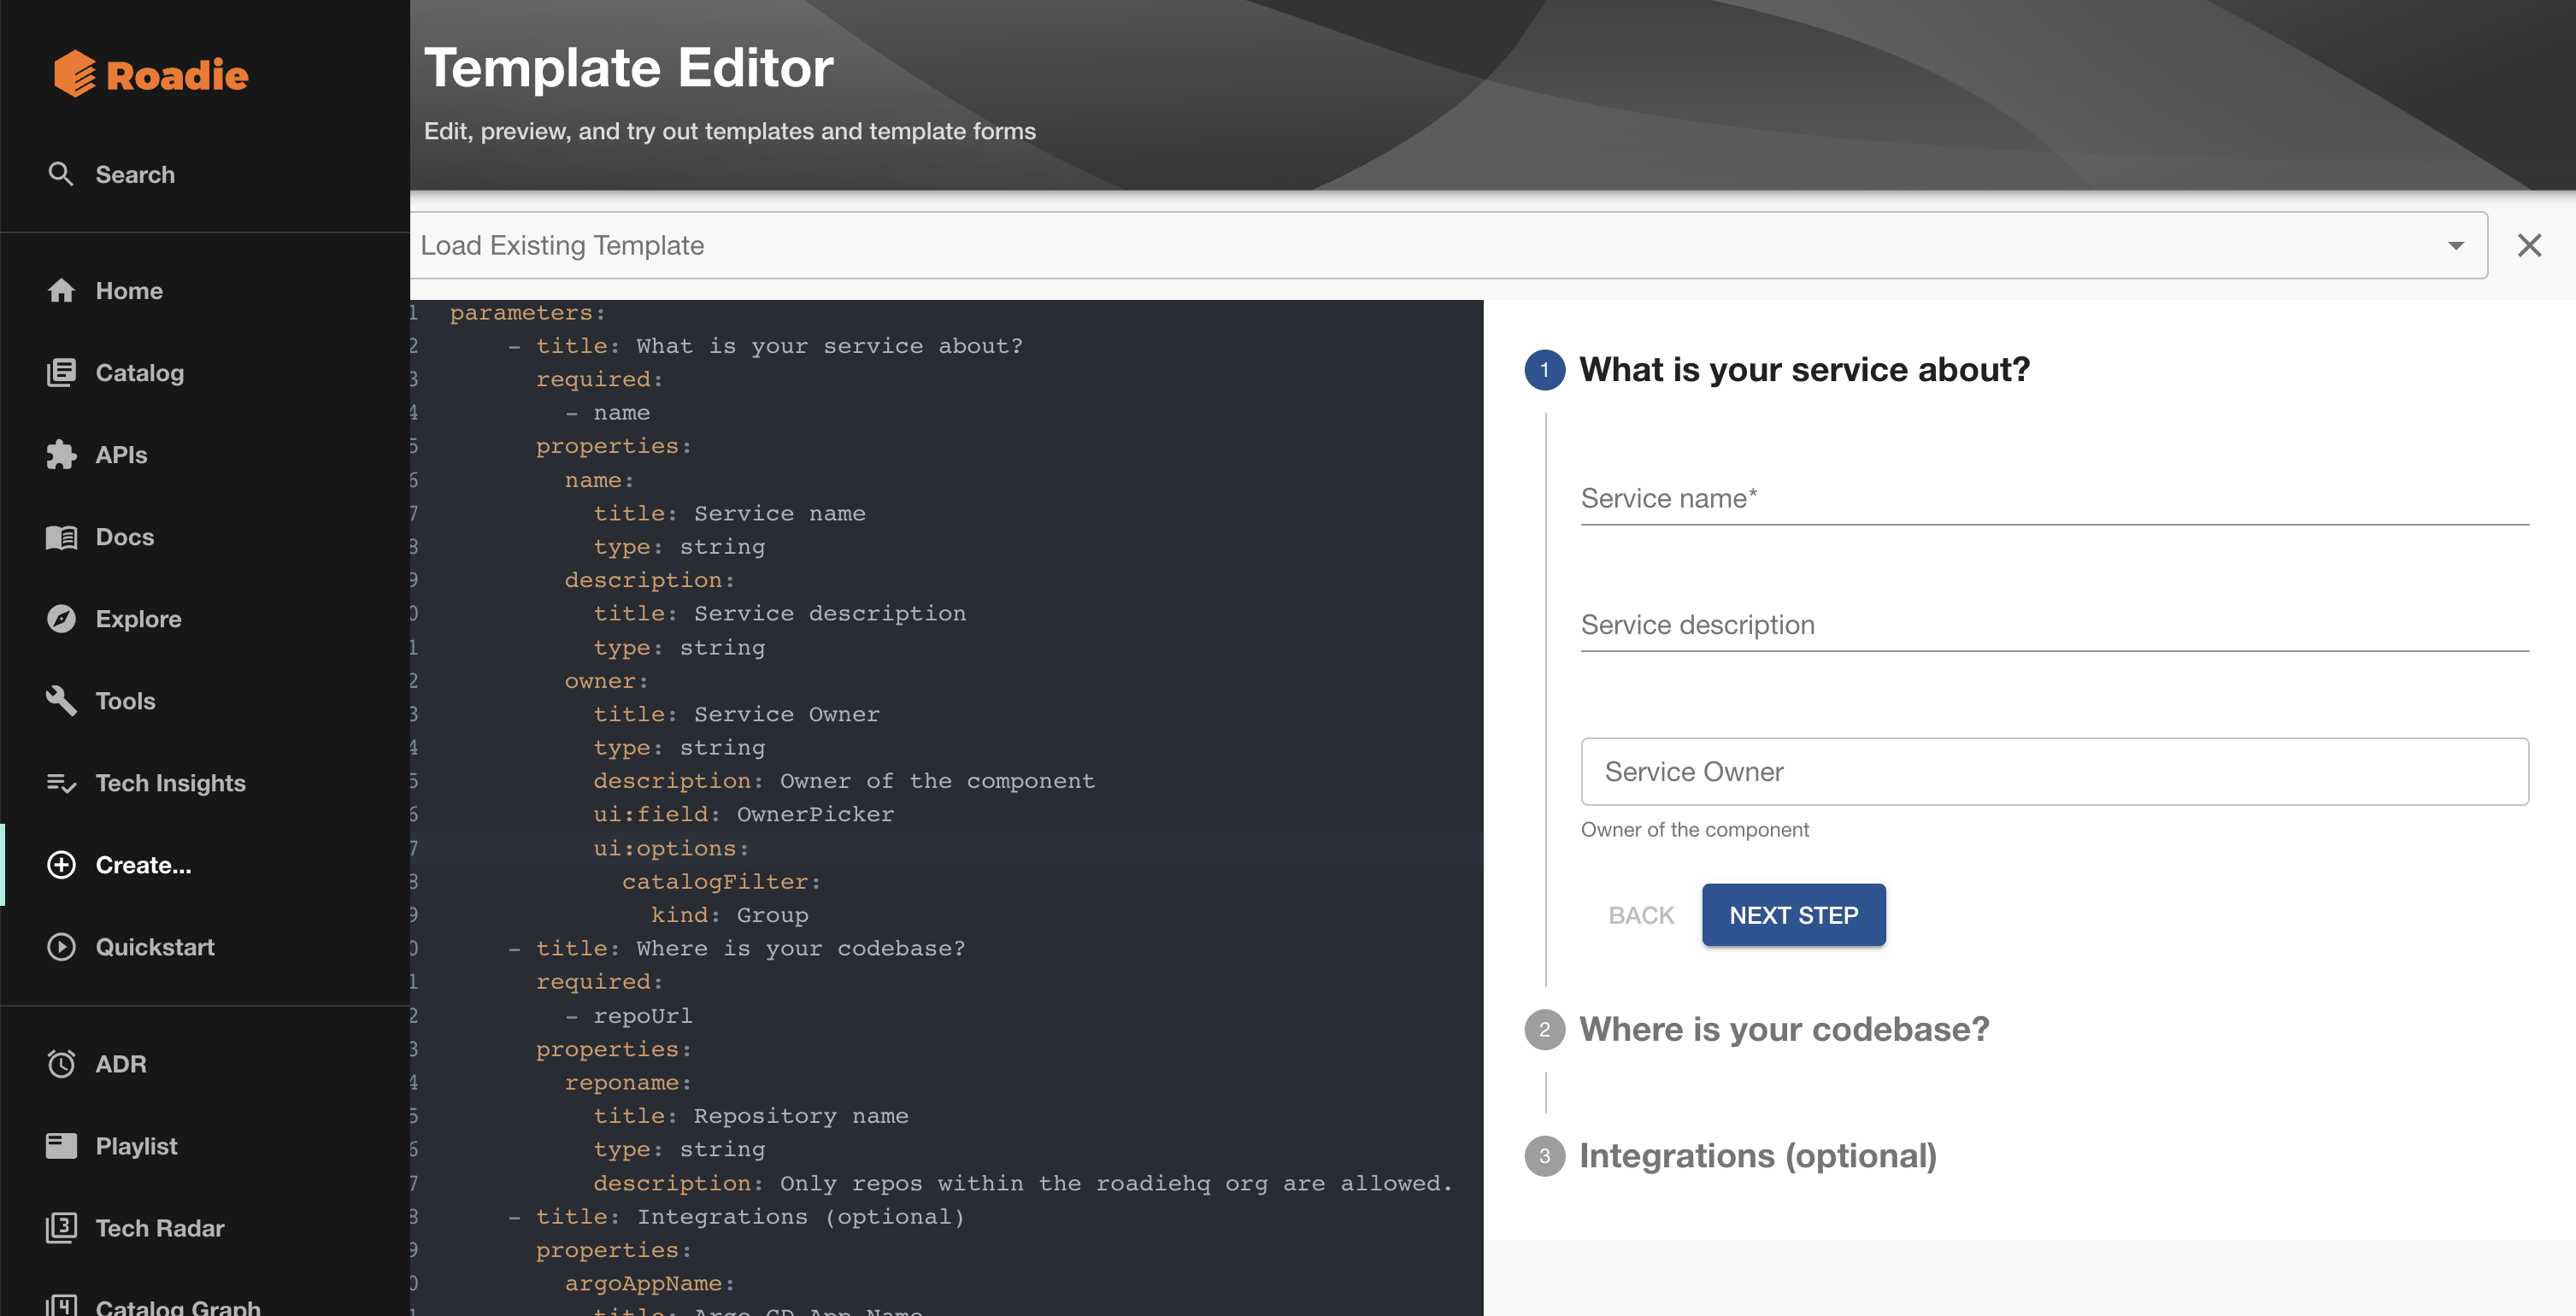
To help you get the form right, Backstage (and thus, Roadie) come with a form editor that you can find under /create/edit → Template Editor. It’s quite handy, specially as your form becomes more complex.
Defining steps
Now, let’s review the steps side of the template. You’ll need two steps. First, you’ll fetch an existing YAML file and replace placeholders within it with the users’s values. The resulting file will be available in the Scaffolder workspace’s root with the same file name. From there, it’ll be possible to open a Pull Request against the target repo with the content of the Scaffolder workspace, which will be a catalog-info.yaml file that describes the service.
This code shows how the steps look like:
steps:
      - id: fetch-template
        action: fetch:template
        input:
          url: ./skeleton
          values:
            name: ${{ parameters.name }}
            description: ${{ parameters.description }}
            owner: ${{ parameters.owner }}
            repoOrg: ${{ parameters.repoOwner }}
            repoSlug: ${{ parameters.repoSlug }}
            argoAppName: ${{ parameters.argoAppName }}
            pagerdutyKey: ${{ parameters.pagerdutyKey }}
      - id: create-pull-request
        name: create-pull-request
        action: publish:github:pull-request
        input:
          repoUrl: ${{ parameters.repoHost }}?owner=${{ parameters.repoOwner }}&repo=${{ parameters.repoSlug }}
          branchName: onboard-to-catalog
          title: Onboard service to Catalog
          description: This PR adds a meta data file about this service so that it can be registered in our software catalog.
Let’s unpack what’s going on in each step. In the fetch-template, I’m loading a relative path that contains a file with placeholders formatted with nunjucks templating . The file is a catalog-info.yaml that looks like this:
apiVersion: backstage.io/v1alpha1
kind: Component
metadata:
  name: ${{ values.name | replace(" ", "-") | lower}}
  title: ${{ values.name }}
  description: ${{ values.description }}
  annotations:
    github.com/project-slug: ${{ values.repoOrg }}/${{ values.repoSlug }}
    {%if values.argoAppName %}argocd/app-name: ${{values.argoAppName}} {% endif %}
    {%if values.pagerdutyKey %}pagerduty.com/integration-key: ${{values.pagerdutyKey}} {% endif %}
spec:
  type: service
  owner: ${{ values.owner }}
You can manipulate strings using filters , use conditional blocks, and pretty much any other templating option available in nunjucks.
Regarding publish:github:pull-request, the only thing worth mentioning is that repoUrl doesn’t look like a familiar URL. That’s because it’s a standard reference used across the Scaffolder actions rather than an actual repository URL.
To help test the steps inputs and outputs, you can dry-run your template with /create/edit → “Load Template Directory.”
Conclusion
Minimizing the friction to using your Catalog will improve the adoption rate. Plus, it can help you provide developers a clear first touch point to start getting familiar with the Developer Portal that you’re building for them. You can find the complete template in our software templates repository .