Modelling users & groups
Published on June 16th, 2022Prerequisites
You should already have a knowledge of how to add entities to the Backstage catalog as described here.
Introduction
Users logged in to Backstage have an identity that can be used to determine if a user has ownership over any entity. This is done using User and Group entities in Backstage. This page describes how to configure Backstage to work with ownership.
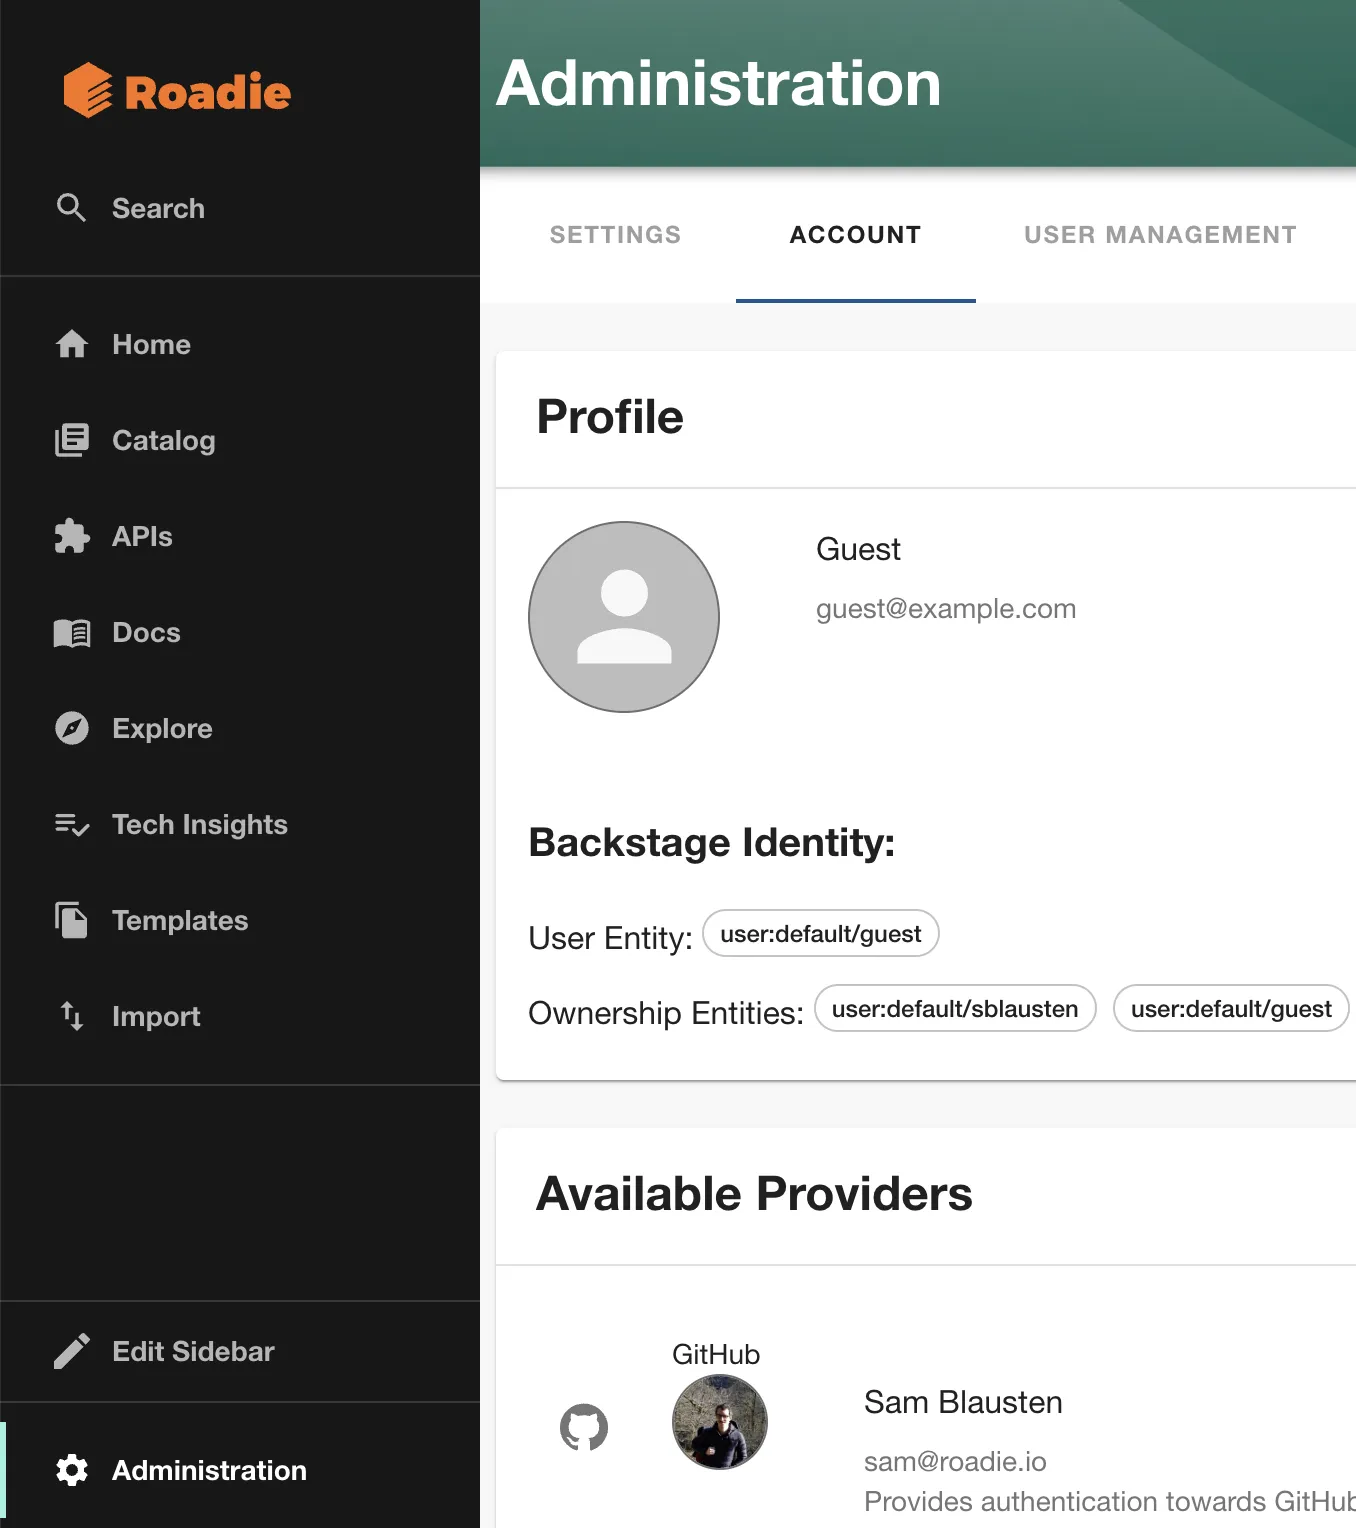
Backstage Identity
When a user logs into Roadie, the user is authenticated either by Roadie's own authentication system, or your own companies Identity Provider.
Either way, we have configured Backstage to populate the logged in users identity as follows:
- We will take the users email address and trim off the domain part of it and use this as the users ID in backstage
- We set the display name and the email in backstage as it appears in the login ID.
- We associate the logged in user with the user component for the user ID in the default namespace. e.g. if my email is
[email protected], my user is associated with the following user entity in backstageuser:default/fname - If the user is also logged in to GitHub via the frontend of Backstage, then the user will also be associated with the entity represented by the GitHub username. e.g. if my GitHub handle is
fnameghthen the identity will be associated with the entityuser:default/fnamegh
You can always inspect the Backstage Identity for the logged in user by going to the "Account" tab in the Administration section.
Creating Users and Groups
Now that you know how Roadie is associating the logged in user with Backstage entities you can start creating users and groups. Roadie currently provides two ways to create users and groups. You can use GitHub Teams or create Users and Group configuration manually.
Manually creating users and groups
If you need to learn about how to add components to Backstage, you can see that here.
You will start by creating a user. This user must be in the default namespace and be named based on the userId described in the Backstage Identity mentioned above.
apiVersion: backstage.io/v1alpha1
kind: User
metadata:
  namespace: default
  name: fname
spec:
  profile:
    displayName: Fname Lname
    picture: https://blah.com/fname
  memberOf:
    - engineering
This user will be associated to the logged in user with the userid fname.
Next you can create a groups to represent the structure of the organization for this user as follows.
---
apiVersion: backstage.io/v1alpha1
kind: Group
metadata:
  namespace: default
  name: engineering
spec:
  type: team
  profile:
    displayName: engineering
    picture: https://blah.com/engineering
  children: []
  parent: technology
---
apiVersion: backstage.io/v1alpha1
kind: Group
metadata:
  namespace: default
  name: technology
spec:
  type: department
  profile:
    displayName: technology
    picture: https://blah.com/technology
  children: []
Now components can be setup to be owned by groups within the structure you have created by adding the owner field to the components as follows:
apiVersion: backstage.io/v1alpha1
kind: Component
metadata:
  namespace: default
  name: my-library-project
spec:
  type: library
  owner: group:default/engineering
  lifecycle: production
Using GitHub teams to create users and groups
You might also choose to load your users and groups from GitHub teams. This can be done by visiting the GitHub integration settings page Administration > Settings > GitHub
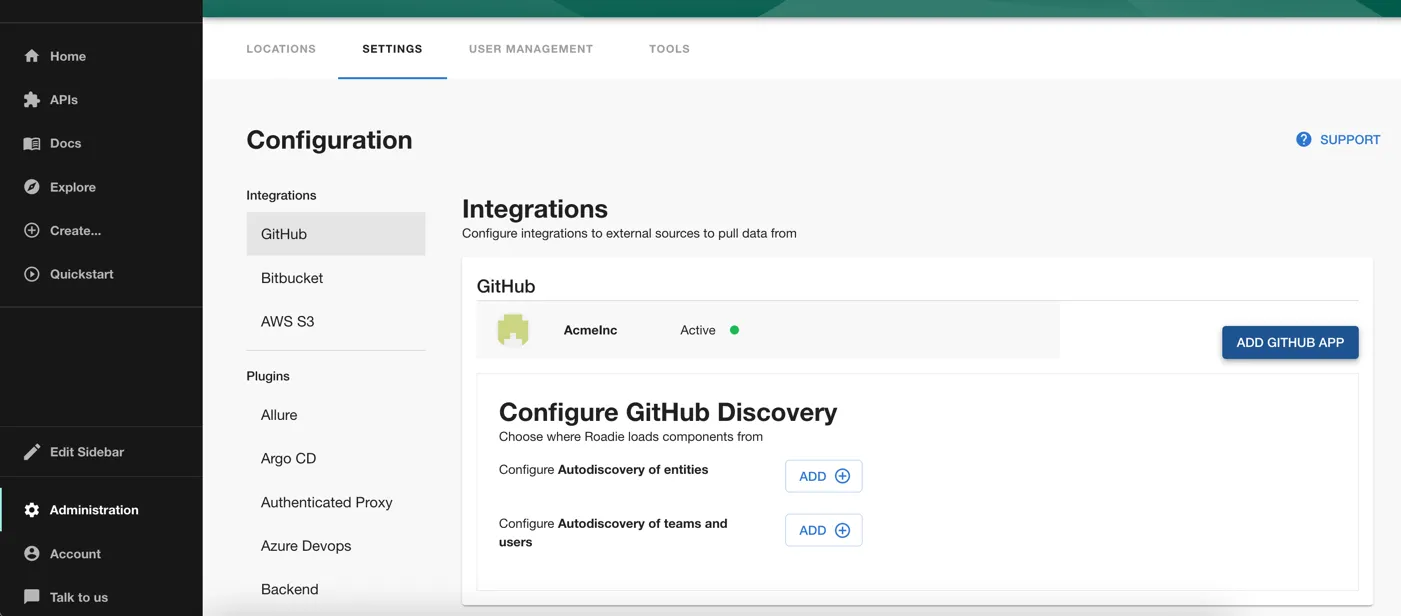
Click on the "Add" button beside "Configure Autodiscovery of teams and users". Now enter the name of your GitHub organization and click Save.
In a few minutes you should start to see Groups and Users loaded into the catalog. When your users login to GitHub in Backstage, they will be associated with the teams that they are a member of in Backstage.
Using code owners
Roadie provides the ability to set the owner of entities from GitHub based on the configuration of code owners in GitHub. In order to enable this feature you can configure your entities with the following annotation.
metadata:
  annotations:
    roadie.io/use-codeowners: 'true'