Accessing AWS Services
Published on March 23rd, 2022Prerequisites
- The Roadie account ID.
- The Roadie backend role.
- (optional) An aws permissions policy name to associate with the role.
The above are accessible via Administration > Settings > AWS S3.
Introduction
You may want Roadie to be able to access AWS services such as EKS or S3 in your account to use the associated Backstage plugins that require access to infrastructure or resources hosted by AWS. In order to do this you must provide us with an identity in your account which we can assume. We use roles for this purpose. This document will describe how to create such a role.
To learn more about the AWS concepts used below, you can read the following AWS documentation pages:
Step 1: Creating the cross account federation role
-
Sign into your AWS console and navigate to the IAM service .
-
Click on ”Role” link (this should be on the left-hand side of your screen).
-
Click on the ”Create Role” button.
-
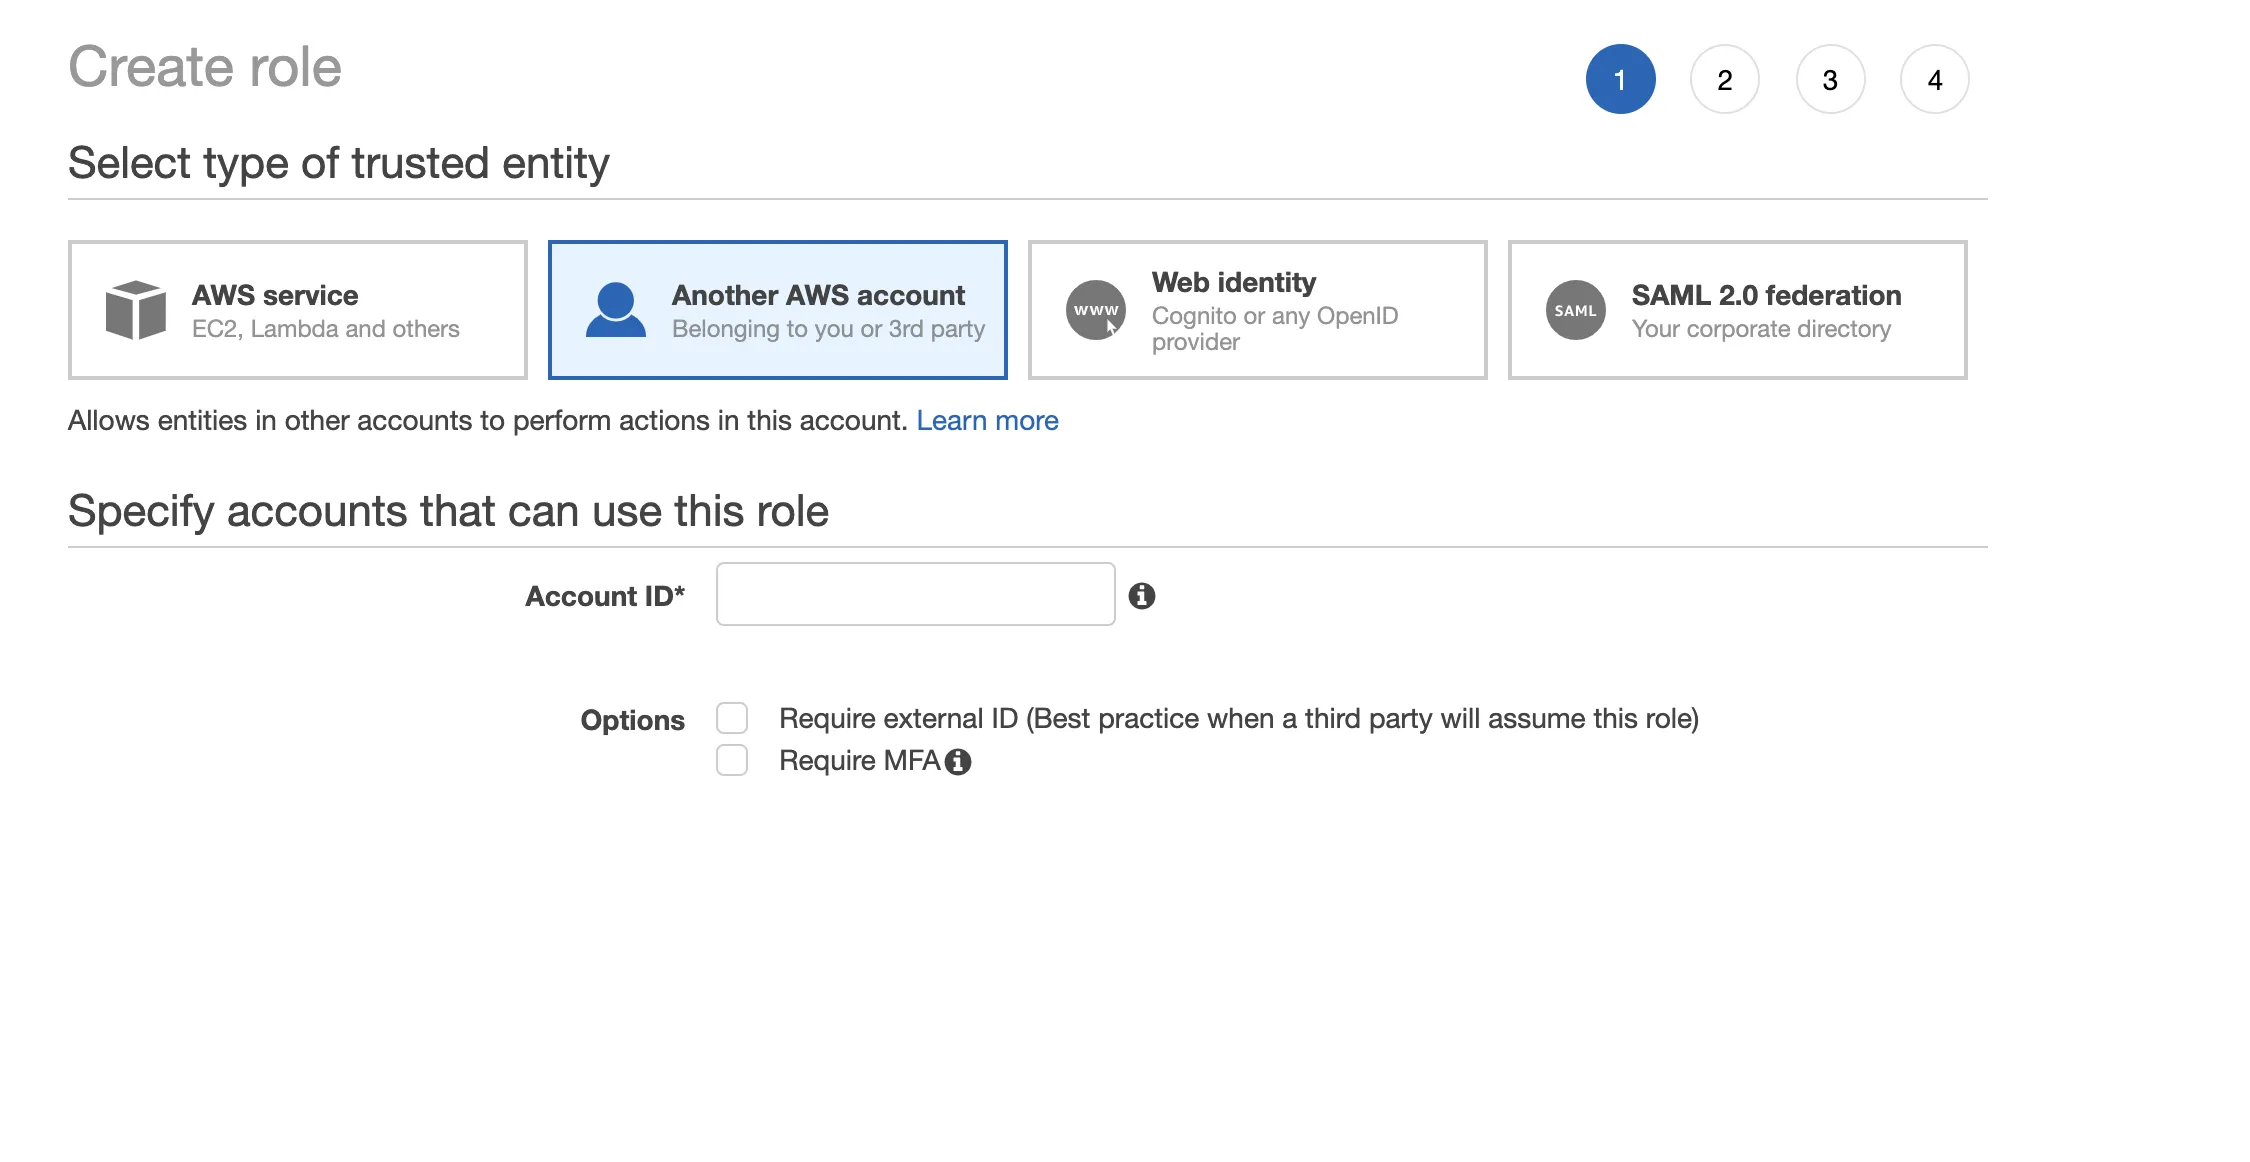
Click on ”Another AWS Account” and add the Roadie account ID and then click on ”Next: permissions”.
-
Click the checkbox beside "Require External ID" and enter some unique value (e.g. a uuid). Make a note of this value as you'll need it later.
-
Attach any desired policies and click on ”Next”.
Note: You may not need to add any policies at this stage. Optional: Add a tag, Key:3rdPartyIntegrationValue:Roadie -
Click ”Next”
-
For the ”Role Name” enter:
<tenant-name>-roadie-read-only-role
<tenant-name> should be replaced by the lower cased value of your company (e.g. "mycompany-roadie-read-only-role") .
⚠️ The enforced naming convention for acceptable assumable roles dictates that the role name needs to start with text
<tenant-name>-roadie-. If other naming conventions are used, the role assumption is blocked by security measures.
- For the ”Role description” enter a description such as:
This is a role that will be assumed by Roadie to access AWS resources in this account.
- It should look like this
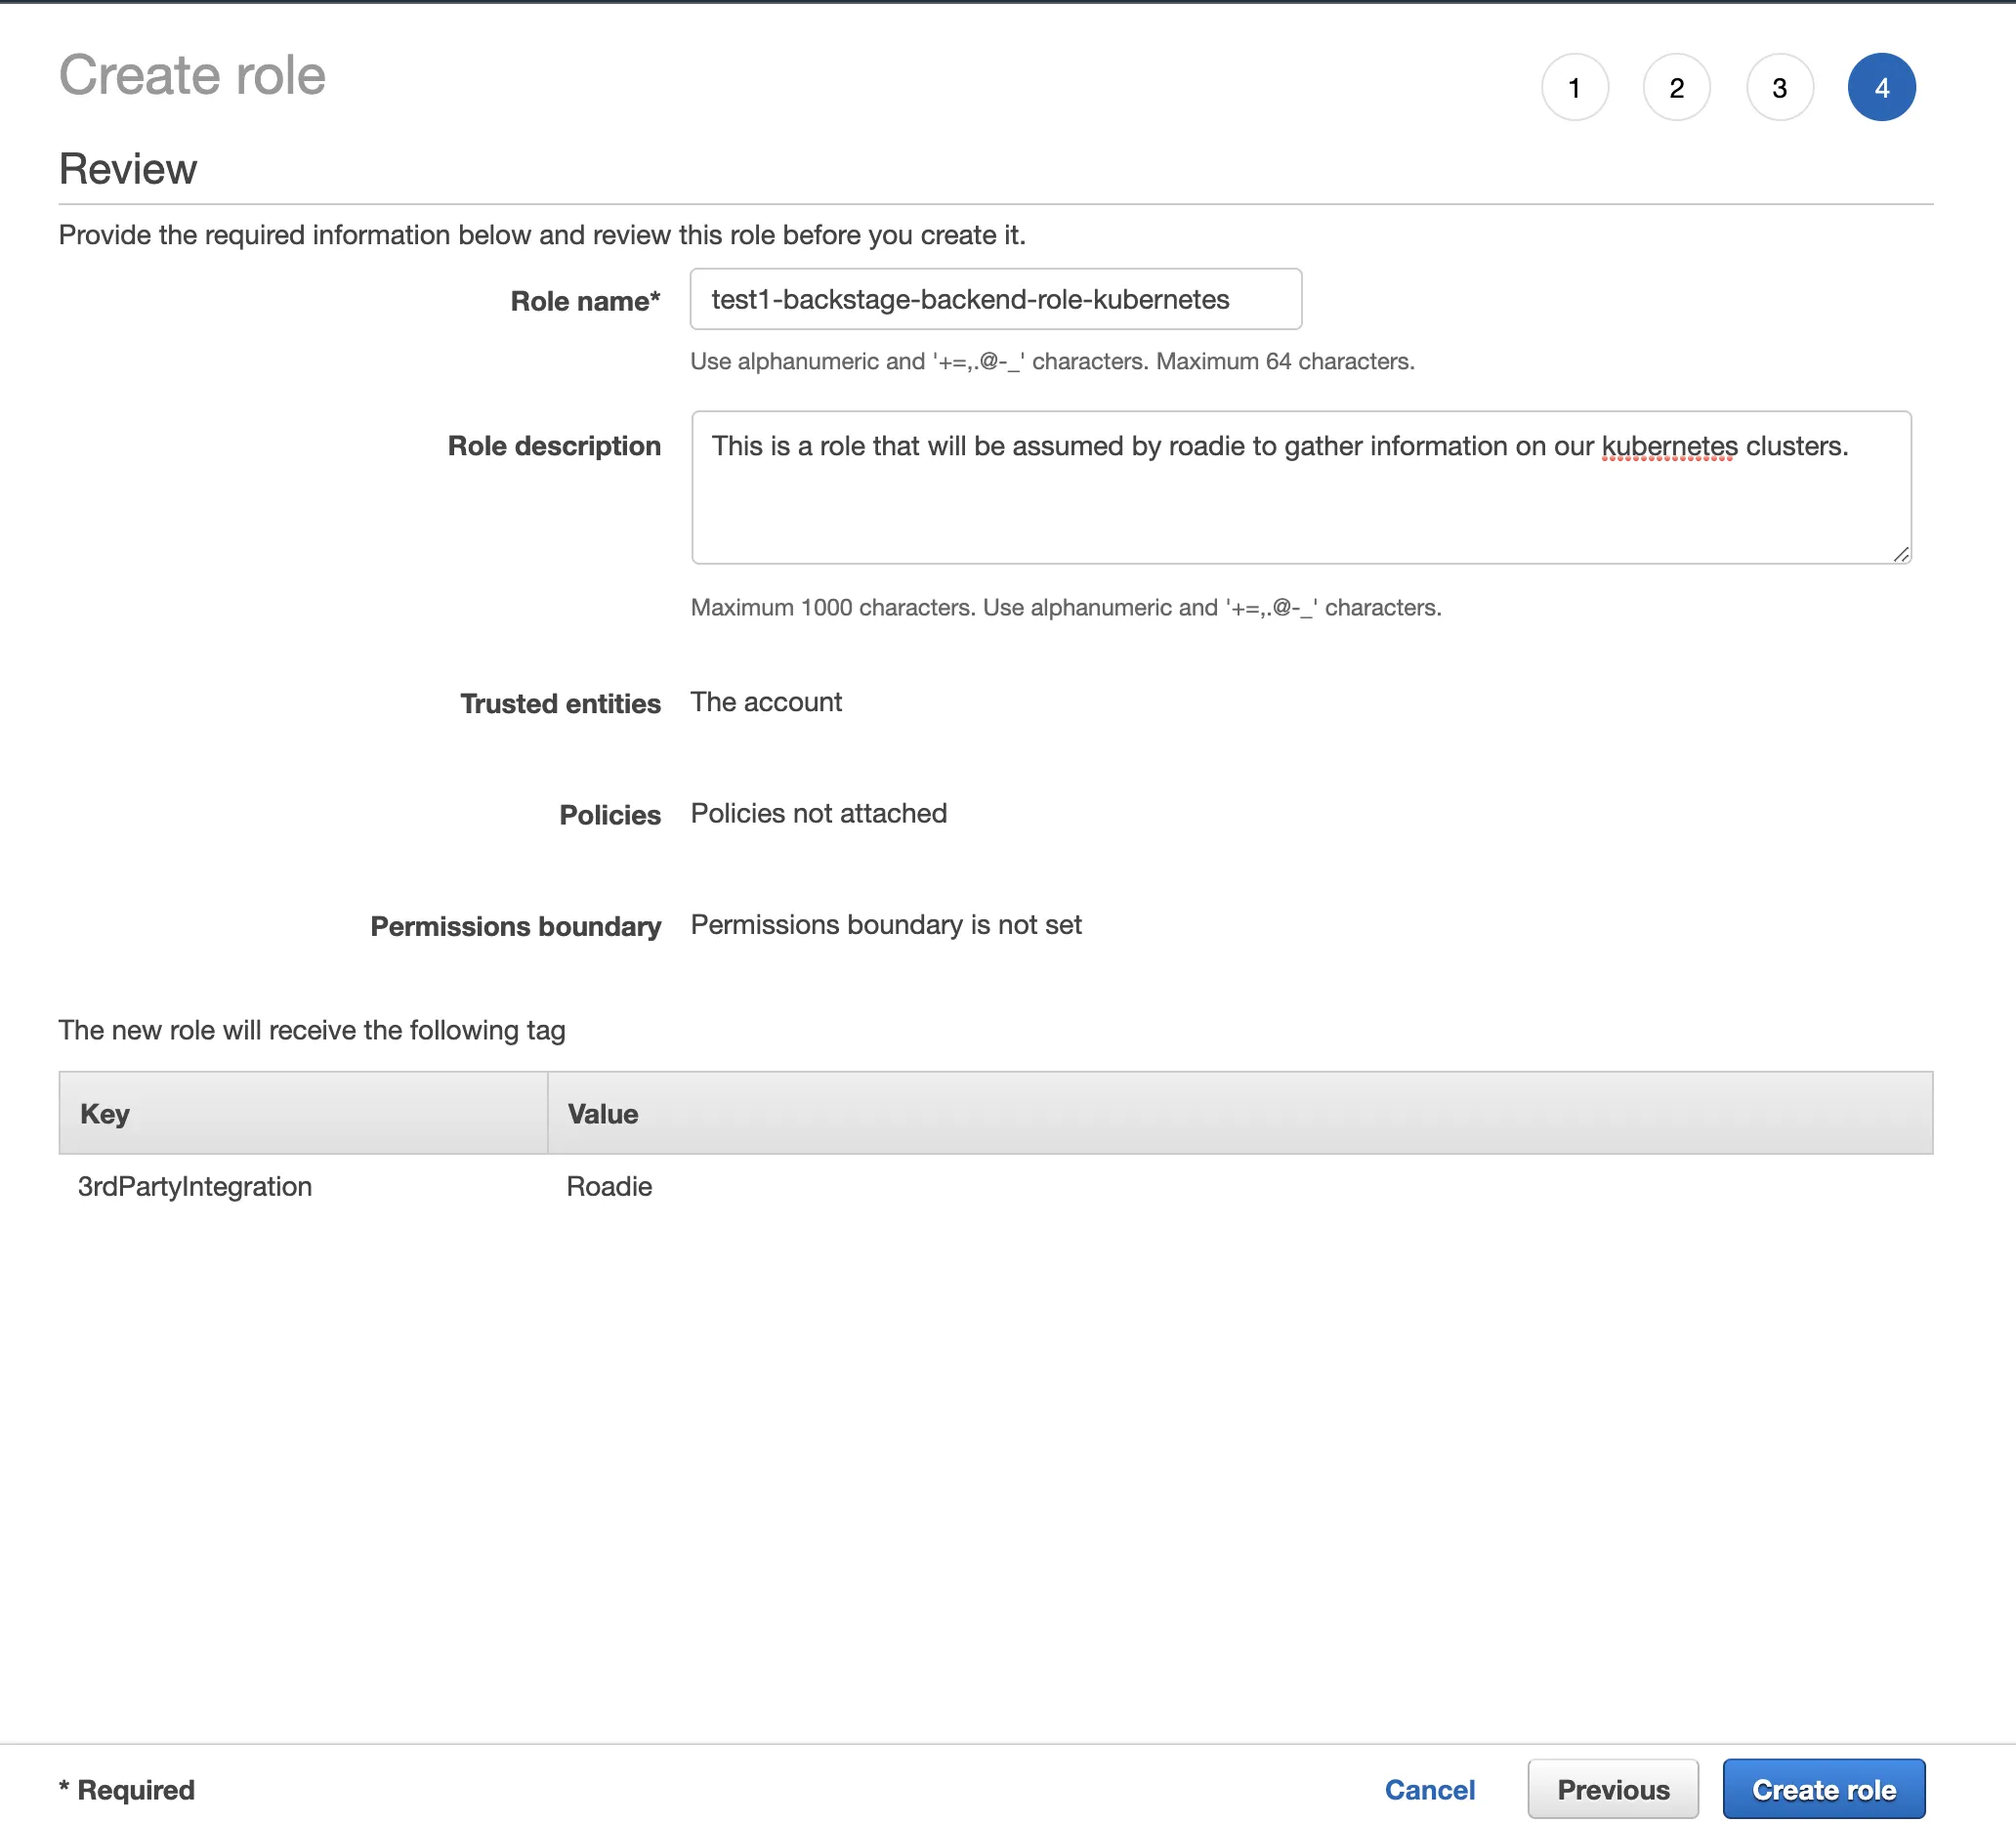
- Click ”Create role”. Your cross federation role is now created.
Step 2: Restrict the new role trust relationships to Roadie only
-
Search for IAM in the services box and then click on ”Roles” on the left hand side tab.
-
Search for your newly created role (e.g. ”roadie-read-only-role”) and click on it.
You should see a page like this
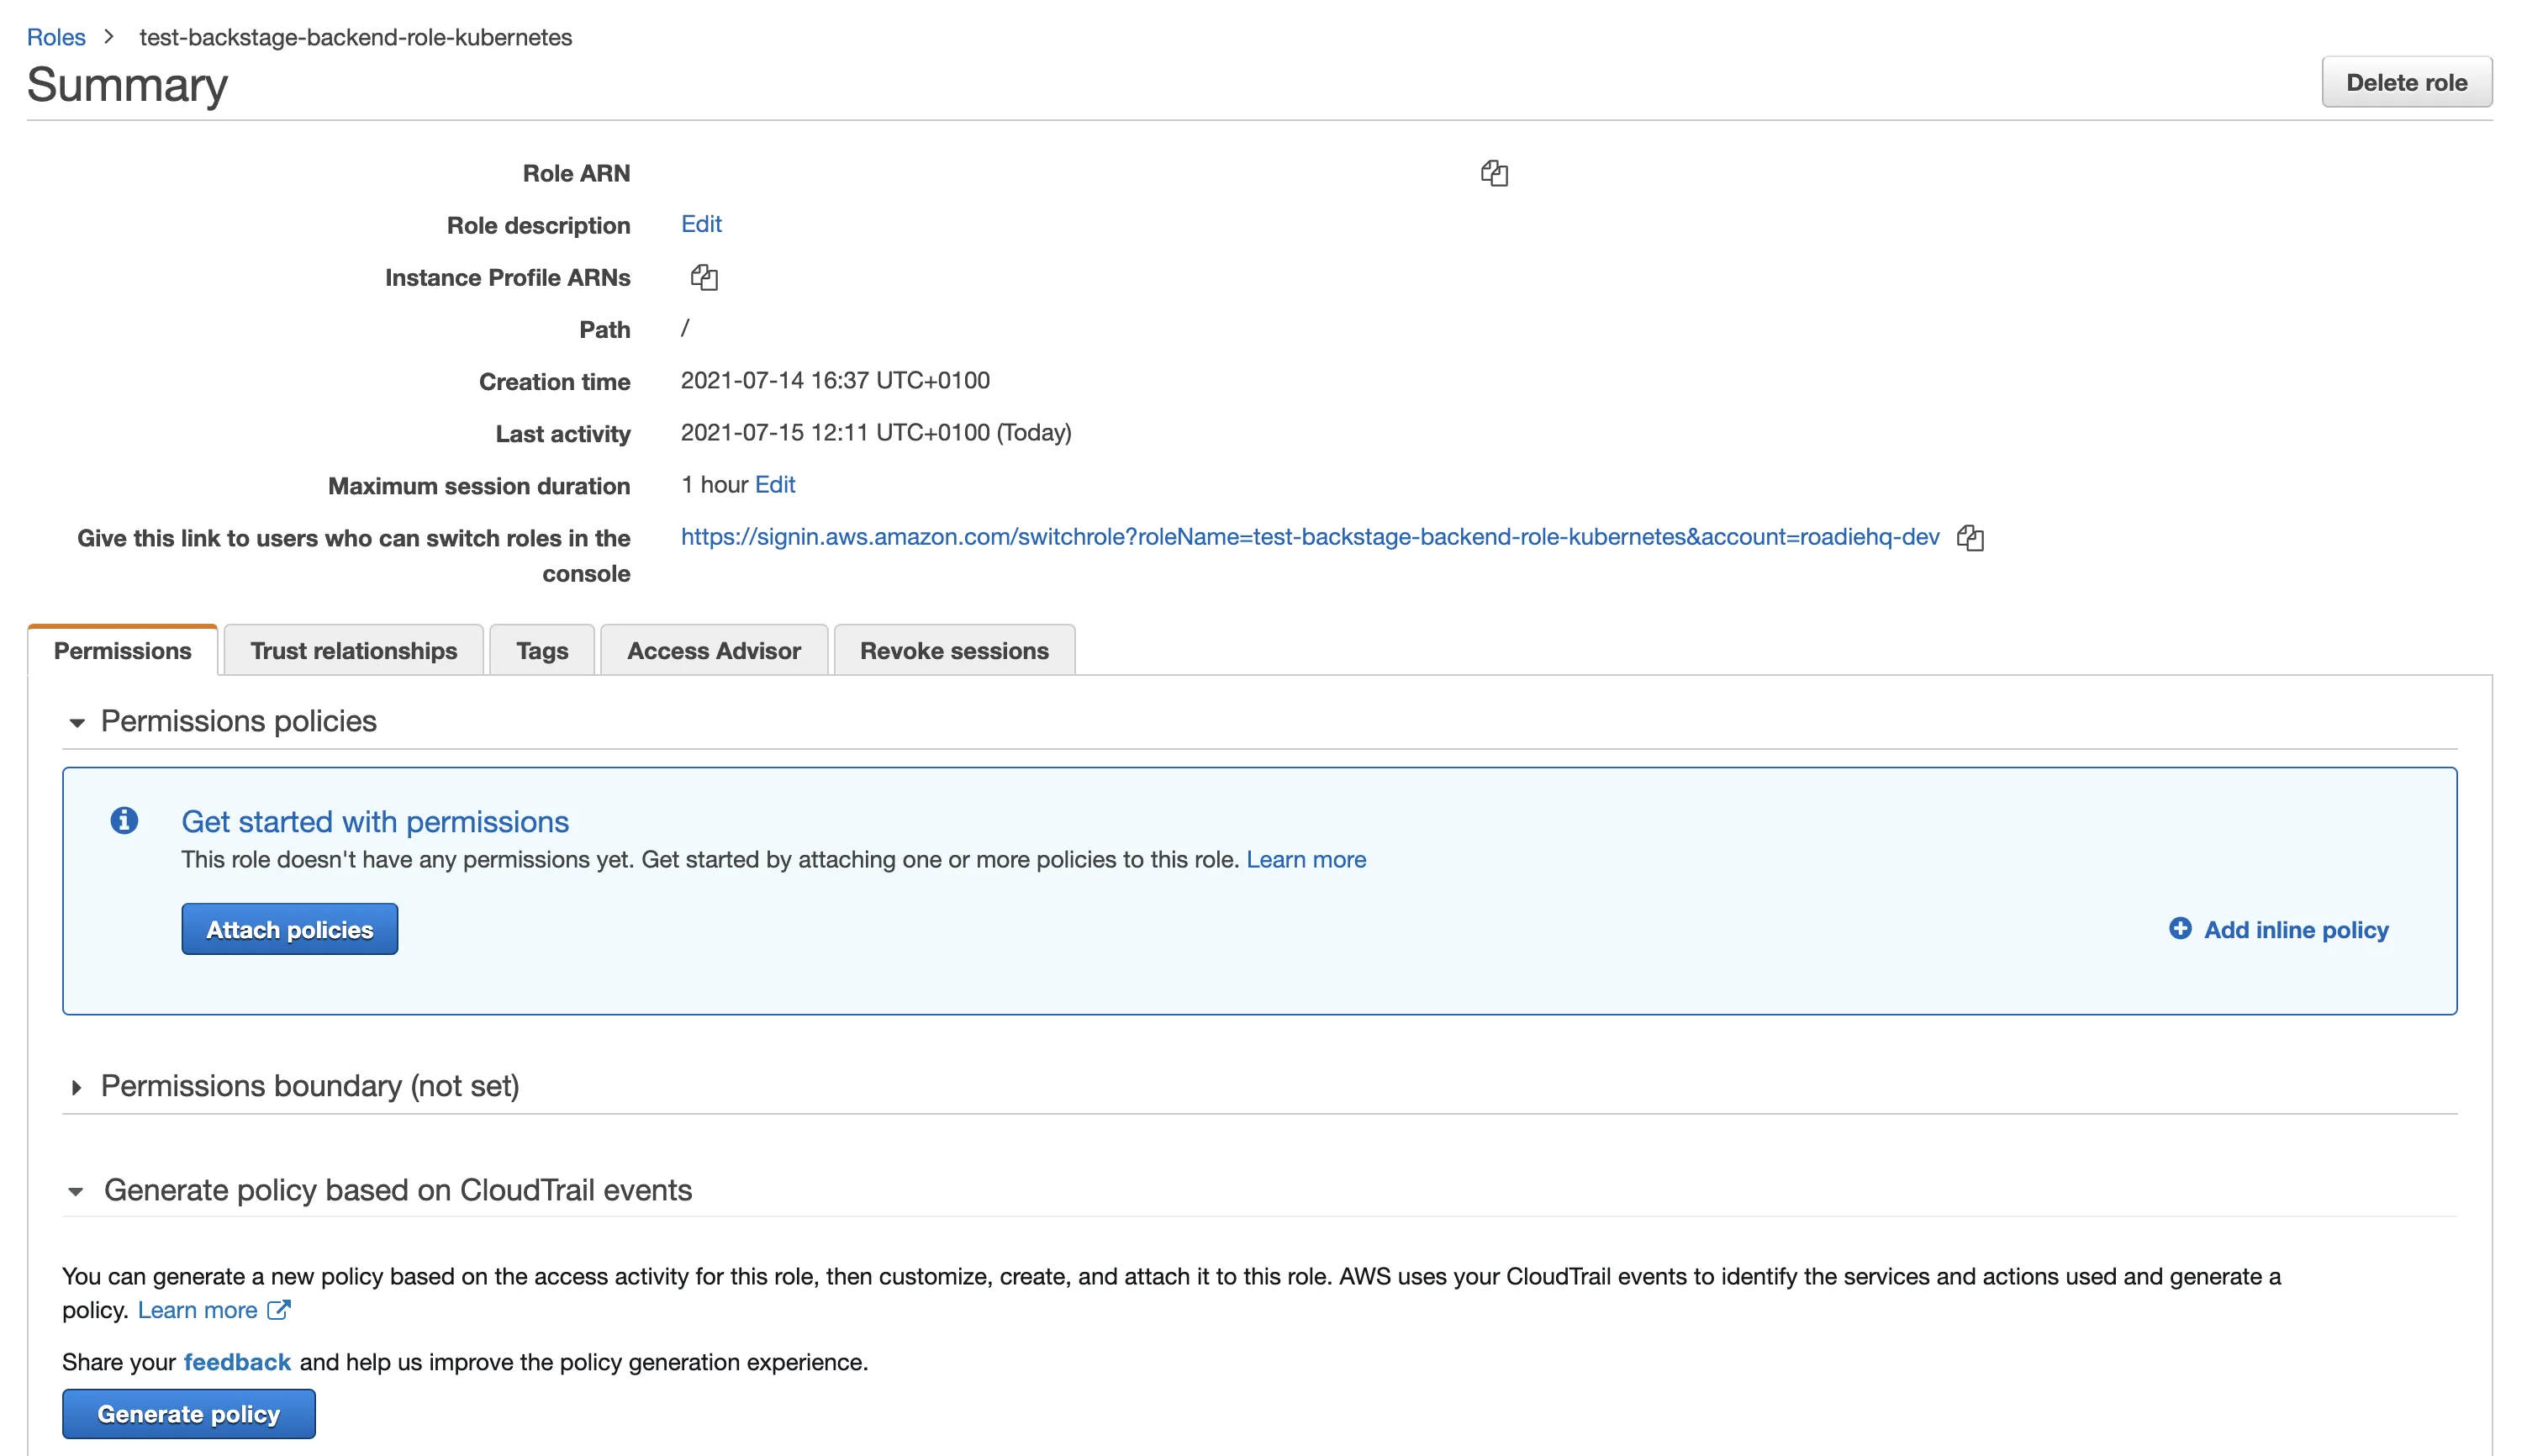
- Click on ”Trust Relationships”, then ”Edit relationship” and add the text below filling in the values:
{
  "Version": "2012-10-17",
  "Statement": [
    {
      "Effect": "Allow",
      "Principal": {
        "AWS": ["<ROADIE ACCOUNT ID>"]
      },
      "Action": "sts:AssumeRole",
      "Condition": {
        "StringEquals": {
          "sts:ExternalId": "<EXTERNAL ID AS CONFIGURED ABOVE>"
        },
        "StringLike": {
          "aws:PrincipalArn": ["*<ROADIE BACKEND ROLE>*"]
        }
      }
    }
  ]
}
ℹ️ The PrincipalArn might be something like *mycompany-roadie-read-only-role*
- Save the changes.