Configuring Proxies for Custom Plugins
Published on February 3rd, 2022Introduction
Roadie provides two kinds of proxy services to enable both the UI frontend plugins or scaffolder tasks to communicate with third party APIs hosted outside of Roadie's infrastructure. They handle the credentials for the third party APIs securely in the Roadie backend so that the UI plugins and scaffolder actions can make use of their features without messing with authentication.
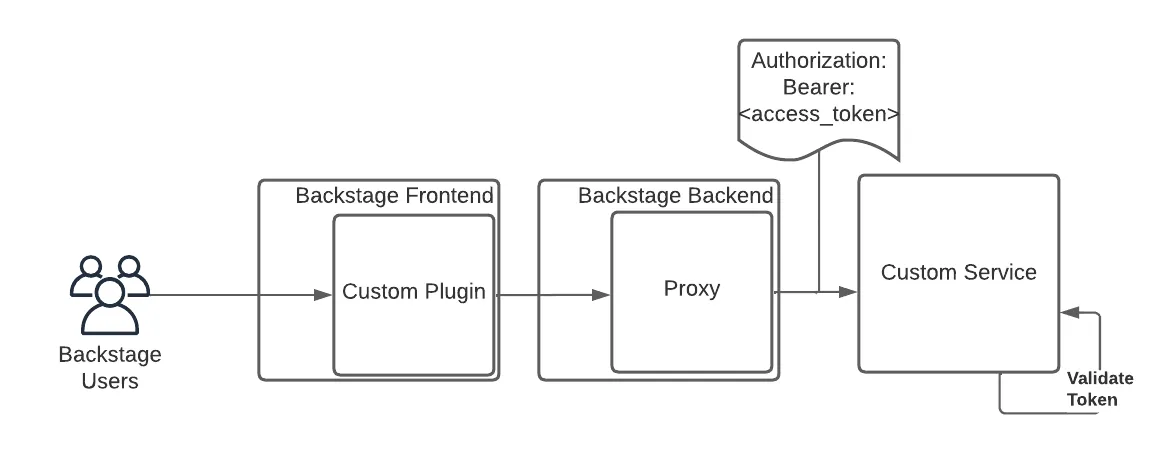
Standard Proxy
Roadie installs the proxy plugin in Roadie and provides administrators the ability to configure custom proxied services from within the Roadie UI.
An administrator of Roadie will configure the proxy with credentials so that when the proxy is called by a UI plugin or a Scaffolder action, the authentication header will be handled in the proxy plugin.
Setup
Step 1. Configure the Proxy
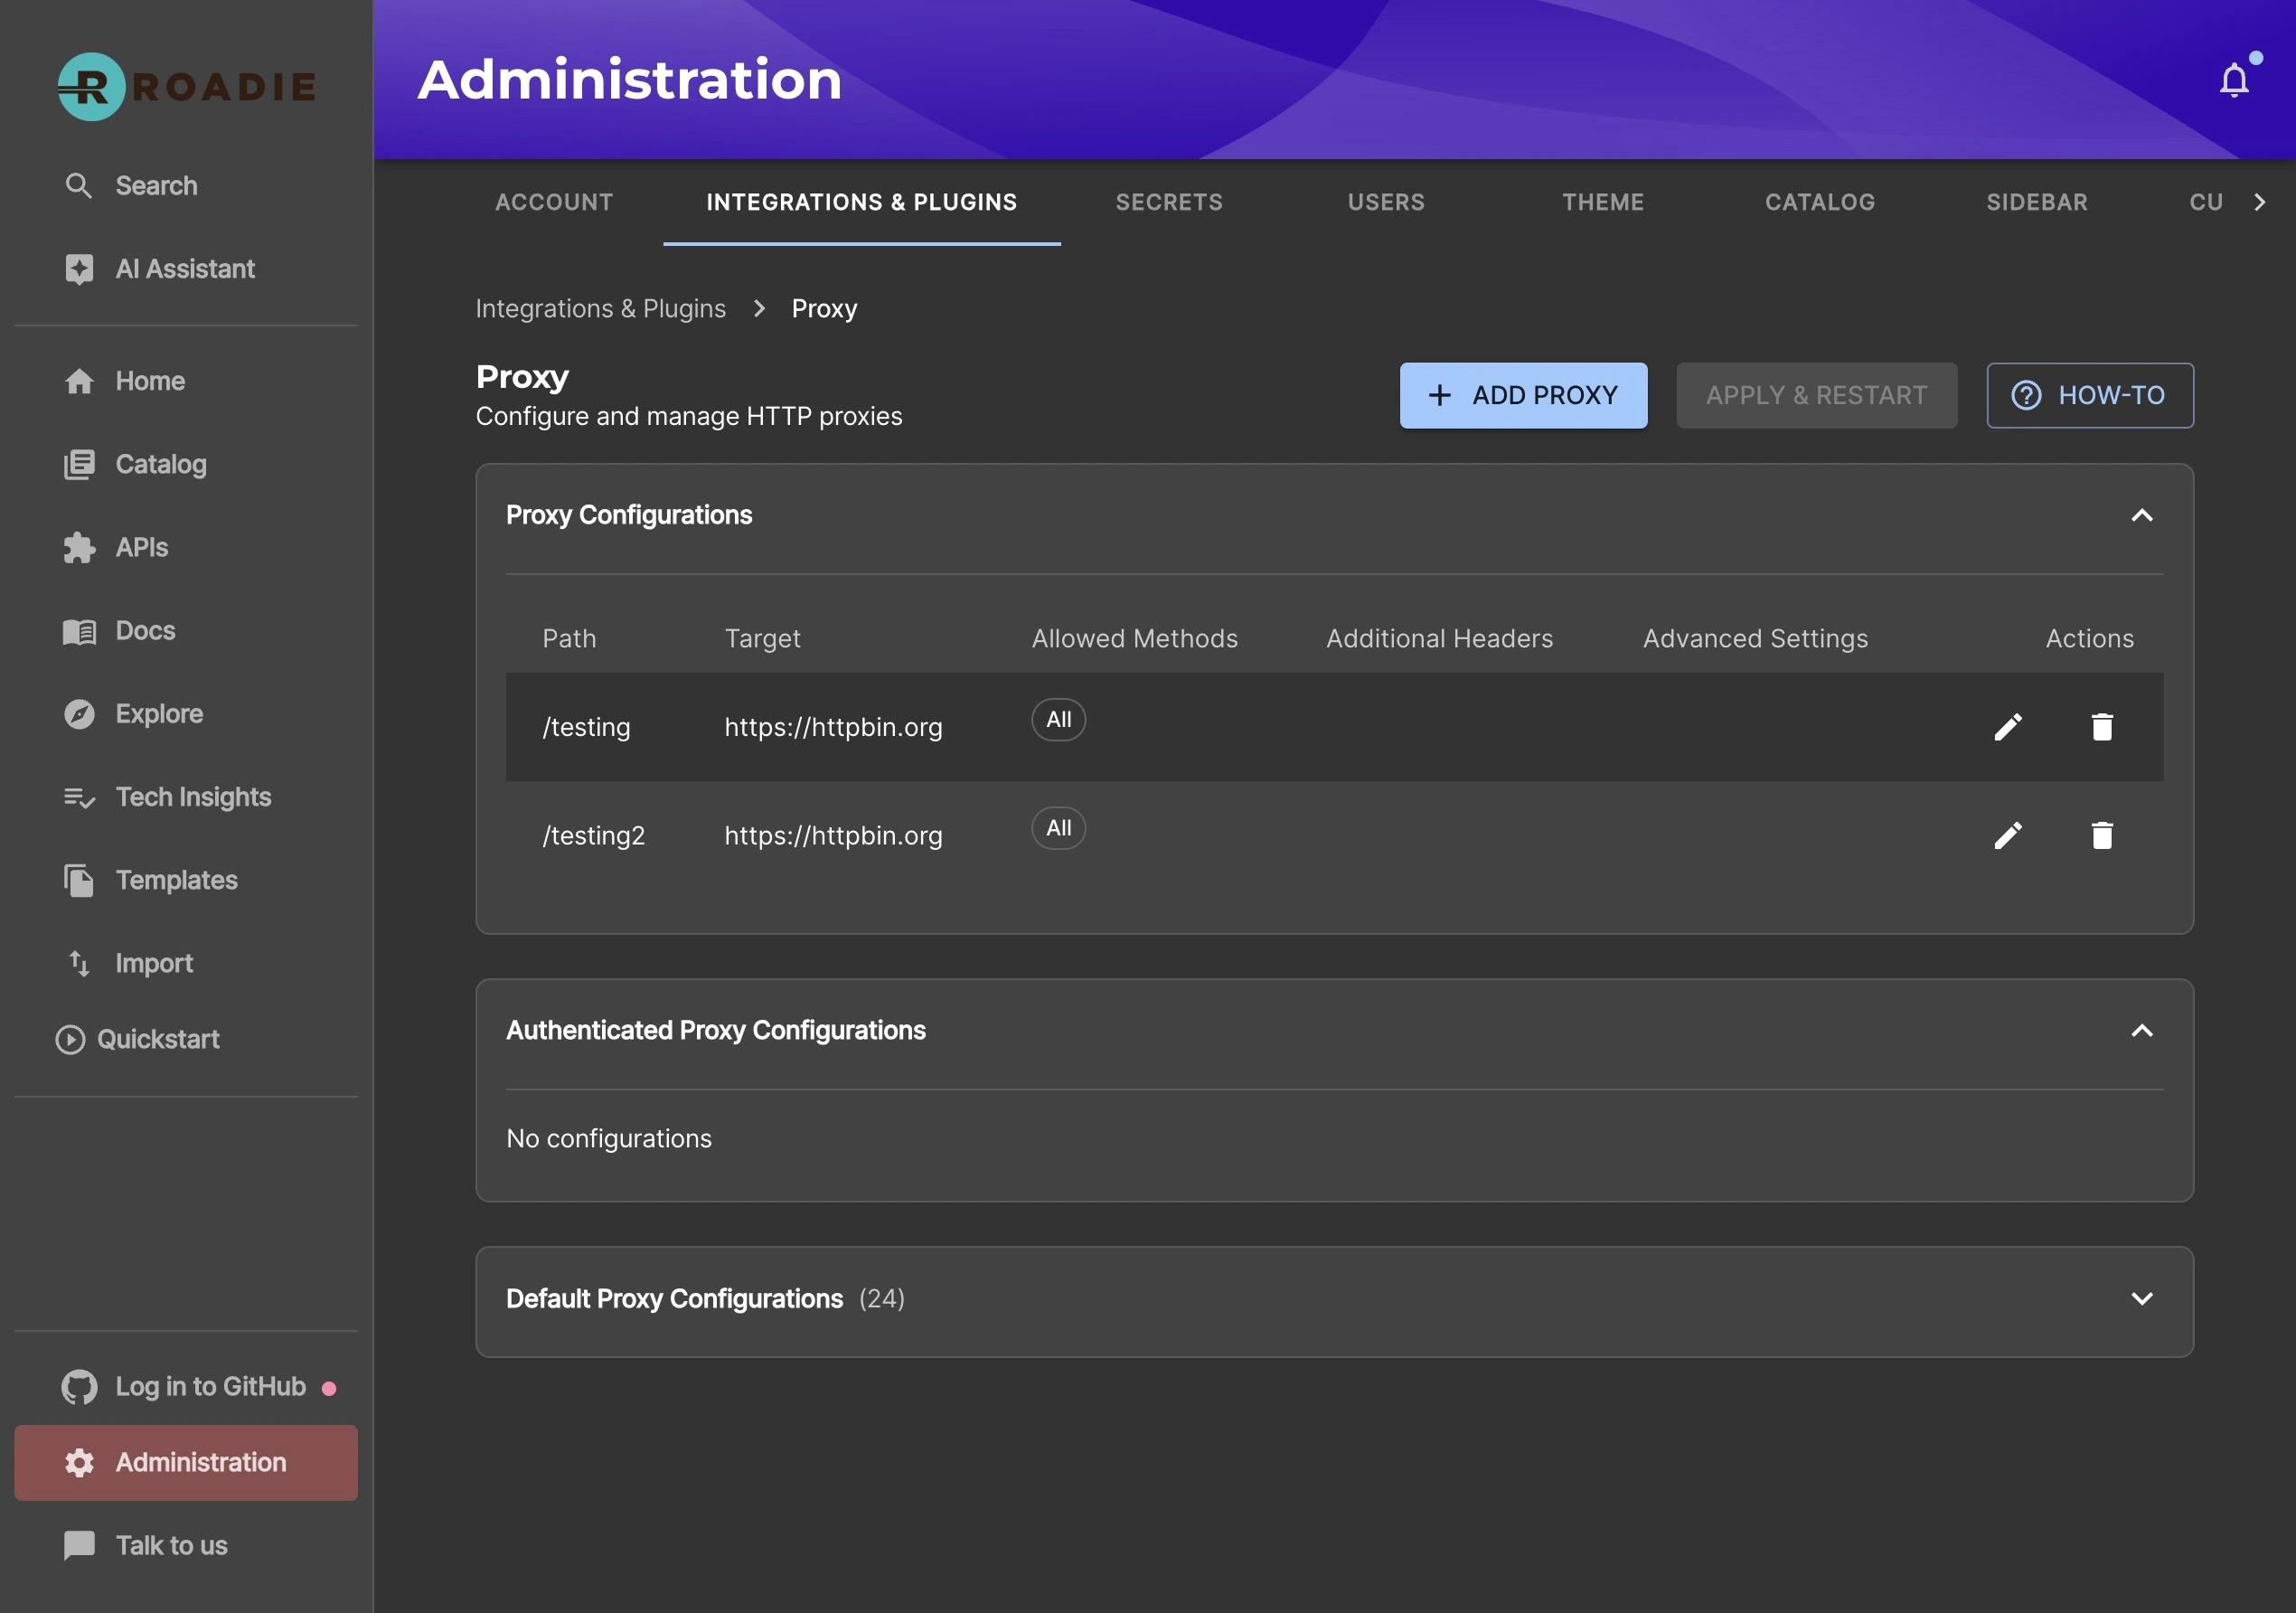
You can navigate to /administration/settings/plugins/proxy. Click "Add Proxy" to add a new proxy.
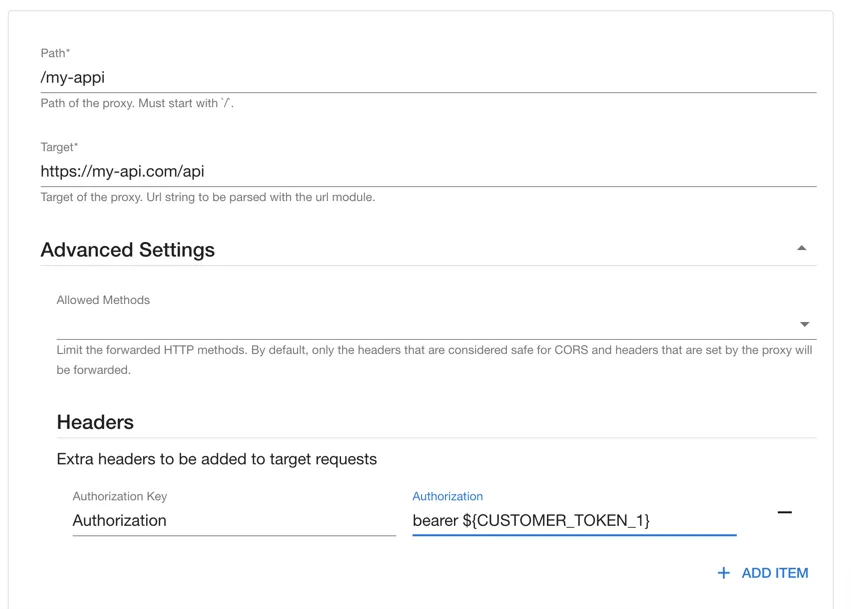
Enter a Path (e.g. /my-api) and a target API (e.g. https://my-api.com/api)
Expand the "Advanced Settings" and click "Add Item" next to the "Headers" section. Add a header with the name "Authorization" and the value "bearer ${CUSTOMER_TOKEN_1}"
Click save and Apply and Restart.
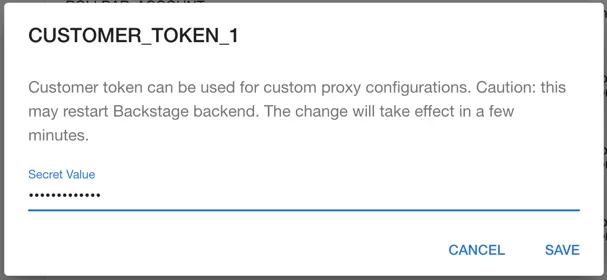
Step 2 Configure the API secret
Next visit the secrets configuration page /administration/secrets. Click the edit icon beside CUSTOMER_TOKEN_1 and set a value for the token and press "Save".
Step 3 Calling the API
You can call this API from the Roadie window context in a browser via a Custom Roadie plugin:
fetch('/api/proxy/my-api');
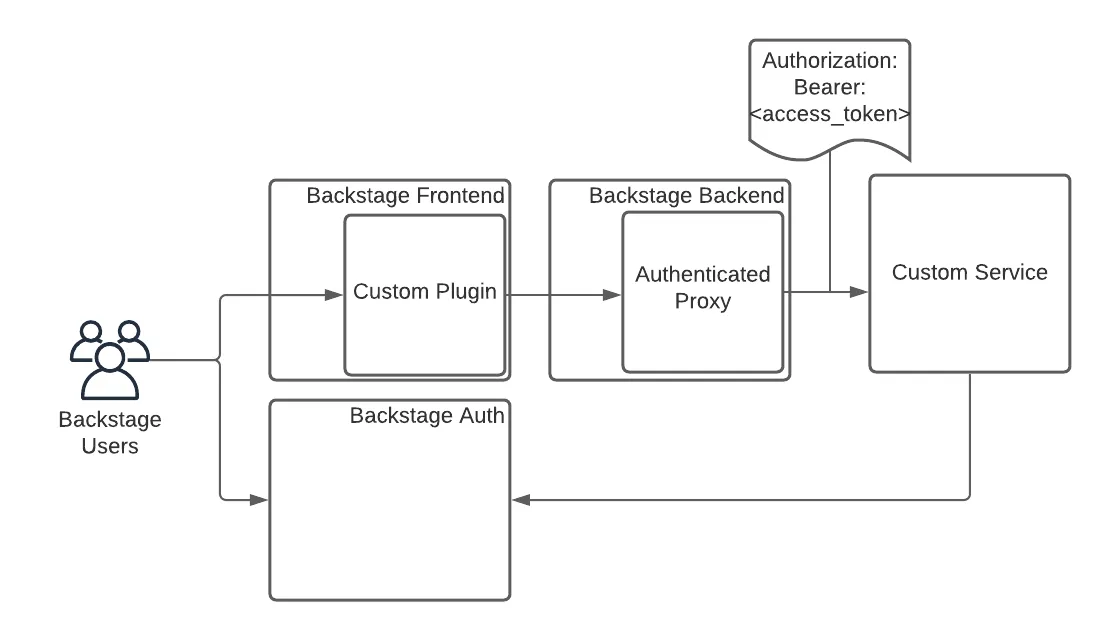
Authenticated Proxy
Roadie provides a custom proxy service that can be configured to proxy through an access token minted by our own authentication system that can be validated by your third party service.
This gives a custom plugin a way to interact with your own service. That service can authenticate the incoming requests from Roadie.
Setup
Step 1. Configure the Proxy
You can navigate to /administration/settings/plugins/proxy. Click add item to add a new proxy.
Enter a Path (e.g. /my-api) and a target API (e.g. https://my-api.com/api).
Click save and Apply and Restart and wait for the restart. It can take up to about two minutes for the change to be applied.
To use authenticated functionality, you need to select the token strategy to use. The default is Roadie which uses the token minted by Roadie's authentication system. The other option is a signed JWT. Both approaches are described below on step 3.
Step 2 Calling the API
You can call this API from the Roadie window context in a browser via a Custom Roadie plugin:
fetch('/api/authenticated-proxy/my-api');
Step 3 Authenticate the Request
The API configured in the Authenticated proxy target will receive a token in the authorization header. Roadie supports two methods for validating this token:
Method 1: JWT Validation using JWKS (Recommended)
The request includes a signed JWT that can be validated using the public keys exposed at your tenant's JWKS endpoint:
https://<tenant>.roadie.so/.well-known/jwks.json
Replace <tenant> with your Roadie tenant name.
Most programming languages have libraries that can automatically fetch and validate JWTs using a JWKS endpoint:
// Node.js example using jsonwebtoken and jwks-rsa
const jwt = require('jsonwebtoken');
const jwksClient = require('jwks-rsa');

const client = jwksClient({
  jwksUri: 'https://<tenant>.roadie.so/.well-known/jwks.json'
});

function getKey(header, callback) {
  client.getSigningKey(header.kid, function (err, key) {
    const signingKey = key.publicKey || key.rsaPublicKey;
    callback(null, signingKey);
  });
}

// Extract token from Authorization header
const token = req.headers.authorization.replace('Bearer ', '');

// Verify the JWT
jwt.verify(token, getKey, {algorithms: ['RS256']}, function (err, decoded) {
  if (err) {
    return res.status(401).send('Unauthorized');
  }
  // Token is valid, decoded contains the user information
  console.log(decoded.sub); // User entity
});
Once validated, the decoded JWT will contain claims about the authenticated user:
{
  "sub": "user:default/my-user-entity",
  "aud": "https://<tenant>.roadie.so",
  "exp": 1765980447,
  "iat": 1765979547,
  "iss": "https://roadie.io"
}
Method 2: Token Introspection via Userinfo Endpoint
Alternatively, you can send the token to the Roadie Authentication system to retrieve information about the logged in Roadie user:
curl --request GET \
  --url 'https://auth.roadie.io/userinfo' \
  --header 'Authorization: Bearer {ACCESS_TOKEN}' \
  --header 'Content-Type: application/json'
This will return the identity as follows:
{
  "sub": "248289761003",
  "name": "John Doe",
  ...
  "updated_at": "1556845729"
}