Set up Backstage in minutes with Roadie
Focus on using Backstage, rather than building and maintaining it.

Installation steps
Install the plugin package in your Backstage app
yarn add @backstage/plugin-sentryConfigure your proxy to add credentials to requests to sentry.
// app-config.yaml
proxy:
  '/sentry/api':
  target: https://sentry.io/api/
  allowedMethods: [ 'GET' ]
  headers:
    Authorization: Bearer ${SENTRY_TOKEN}
sentry:
  organization: 'your org'
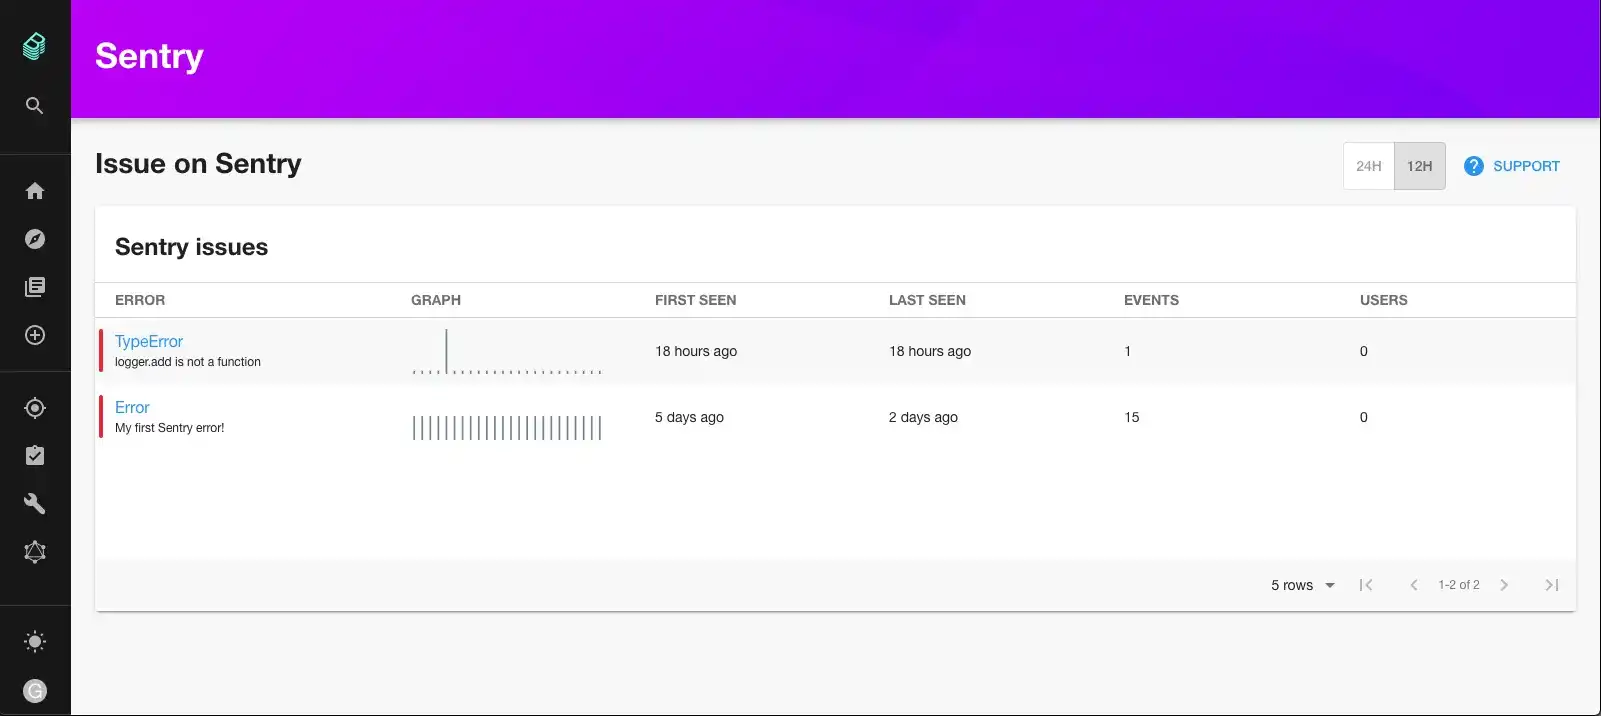
Add the plugin components to your entity page
import { EntitySentryContent, EntitySentryCard } from '@backstage/plugin-sentry';
// Add to the overview grid
const overviewContent = (
  <Grid container spacing={3} alignItems="stretch">
     {/* ...other routes */}
     <Grid item md={6}>
       <EntitySentryCard />
     </Grid>
  </Grid>
);
// Add a Sentry Tab
const serviceEntityPage = (
  <EntityLayout>
    <EntityLayout.Route path="/sentry" title="Sentry">
      <EntitySentryContent />
    </EntityLayout.Route>
  </EntityLayout>
);
Found a mistake? Update these instructions.
Things to know
The Backstage backend must have access to a SENTRY_TOKEN API key environment variable.
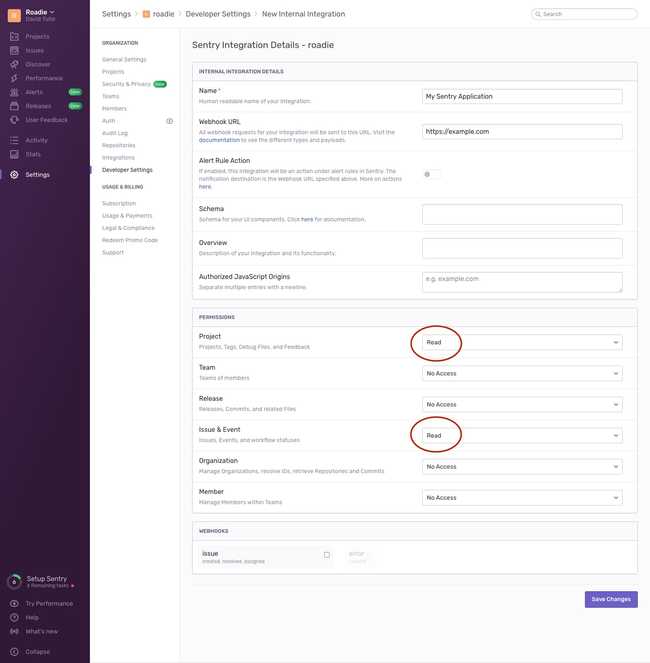
To get an API key, first create an internal application in the Sentry UI. Do this at the organization level, rather than the personal level.
Give your application a name and a Webhook URL, then be sure to give the ability to read issues and projects. These will be displayed in Backstage so it’s important that the plugin can access them.
Once you have an internal application, you can create a token. Run the Backstage backend with this token.
env SENTRY_TOKEN=123abc yarn startSet up Backstage in minutes with Roadie
Focus on using Backstage, rather than building and maintaining it.

