Git Release Manager helps you manage GitHub releases from inside Backstage. It gives you a simple UI for release steps that usually require a handful of git commands. It does not build or ship your code. It focuses on creating and updating Git release objects that your CI can react to.
The plugin supports common versioning styles such as semver or calver. You can create a release candidate, patch it with selected commits, then promote it to a final release. Behind the scenes it creates the appropriate branch and tags, updates the GitHub release entry, and leaves delivery to your pipelines. This keeps the process consistent across teams while reducing manual mistakes. It is a good fit for self hosted Backstage where multiple services share the same release workflow.
If you are sizing up whether to add this plugin, think about the time you spend on tagging, cherry picking, and promotion today. Centralizing those actions in Backstage gives engineers a predictable path to ship.

Installation Instructions
These instructions apply to self-hosted Backstage only.
Install the frontend package
From your Backstage app directory
yarn --cwd packages/app add @backstage-community/plugin-git-release-manager
Add the page route
Edit packages/app/src/App.tsx
Import the page
import { GitReleaseManagerPage } from '@backstage-community/plugin-git-release-manager';
Mount it on a route so people can open it
// inside <FlatRoutes> in App.tsx
<Route path="/releases" element={<GitReleaseManagerPage />} />
Add a sidebar link
Edit packages/app/src/components/Root/Sidebar.tsx
Add a link to the new route
import LaunchIcon from '@material-ui/icons/Launch';

// inside the <SidebarGroup label="Menu"> or similar
<SidebarItem icon={LaunchIcon} to="releases" text="Releases" />
Optional fixed project config
You can lock the project on the page. This disables the selects on the screen
// packages/app/src/App.tsx
import { GitReleaseManagerPage } from '@backstage-community/plugin-git-release-manager';

<Route
  path="/releases"
  element={
    <GitReleaseManagerPage
      project={{
        isProvidedViaProps: true,
        owner: 'my-org',
        repo: 'my-repo',
        versioningStrategy: 'semver', // or 'calver'
      }}
    />
  }
/>
You can keep it without props if you prefer to pick owner and repo in the UI
Git provider setup
Make sure your Backstage app can talk to your Git provider
Add a GitHub integration in app config
# app-config.yaml
integrations:
  github:
    - host: github.com
      token: ${GITHUB_TOKEN}
If your app uses the backend proxy for GitHub, add a proxy entry
# app-config.yaml
proxy:
  '/github':
    target: https://api.github.com
    headers:
      Authorization: 'token ${GITHUB_TOKEN}'
Use a token with rights to read and write releases and tags
What you get on the page
- Create a release candidate tag and release
- Patch a release branch with a selected commit
- Promote a release candidate to a release
You can control features with props if you need to tailor the page further
Things to Know
The Git Release Manager plugin is a full page component that can be used to automate the release process for one or more Git repositories hosted on GitHub.
On initial page load, you are prompted to select a versioning strategy, personal or organization account and repository to manage. You can manage releases for your personal Git repositories as well as any repositories owned by organizations for which you are a member and have access.

Once a repository is selected, it is scanned for tags that meet the selected versioning strategy's naming conventions. There are 3 features available to help manage the release process:
-
Create a release candidate from an existing Git tag. A new Git branch and tag is created for the release candidate:

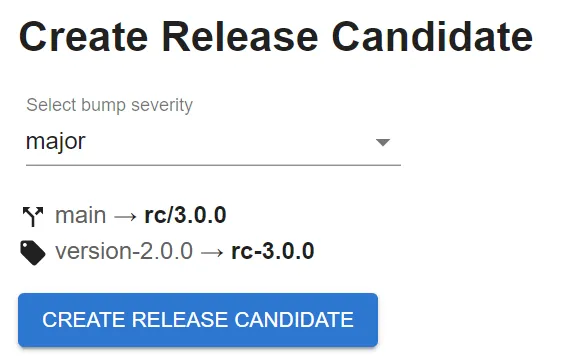
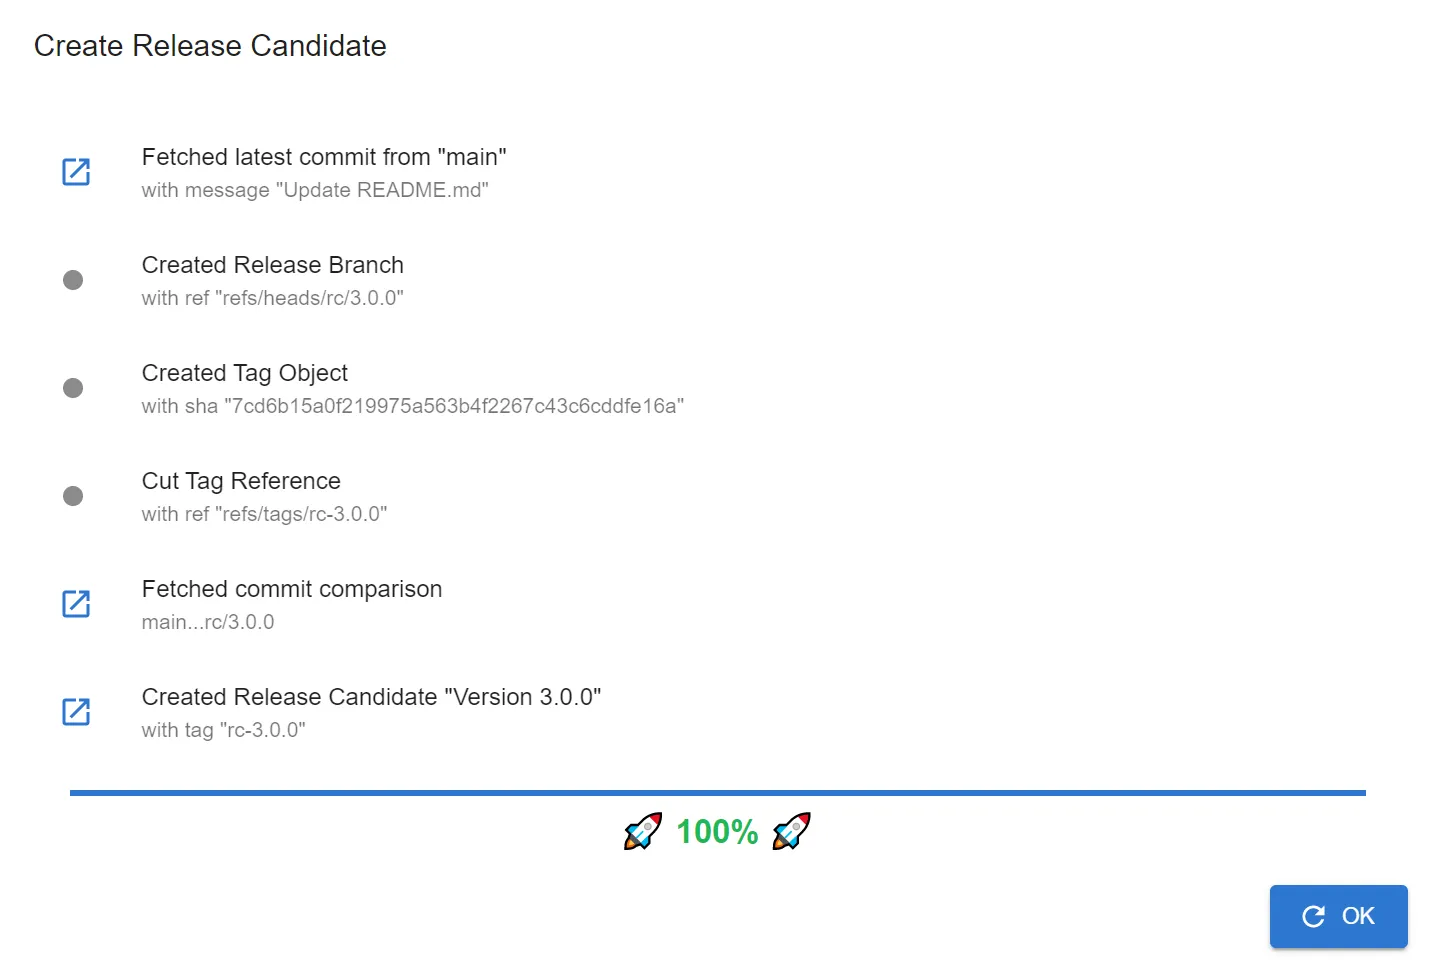
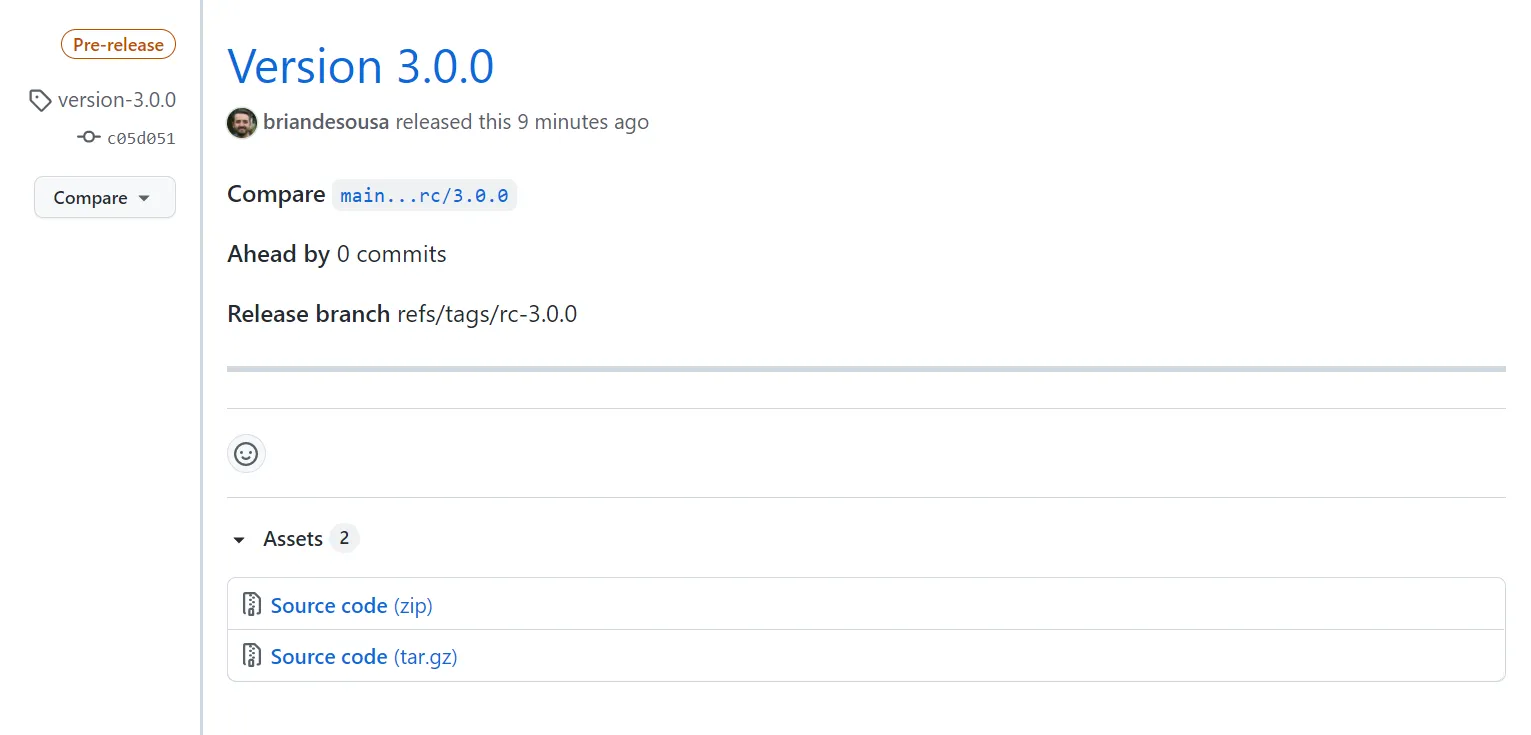
A GitHub release is also created with the pre-release flag enabled:
-
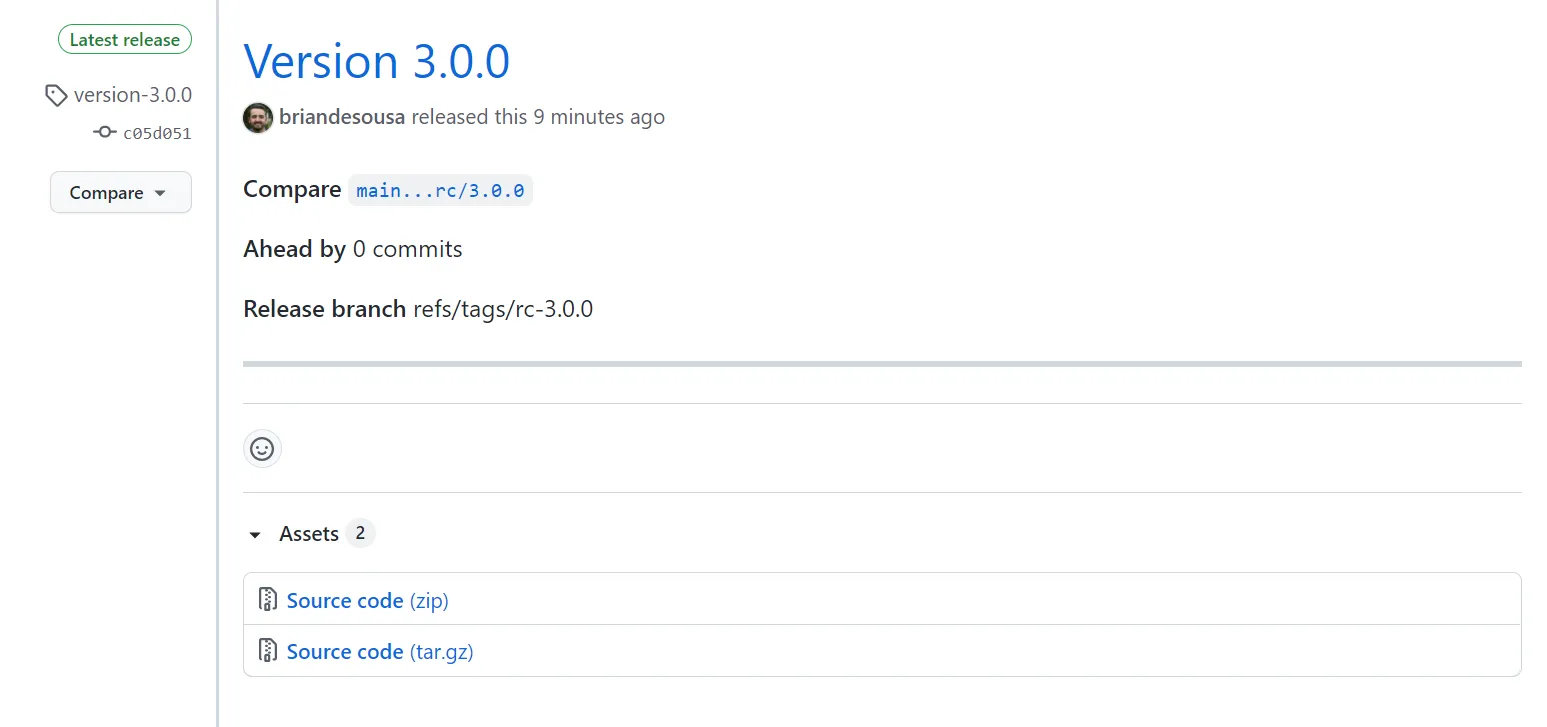
Promote a release candidate to a release. A new Git tag is created for the release:


The pre-release flag on the GitHub release is also removed:
-
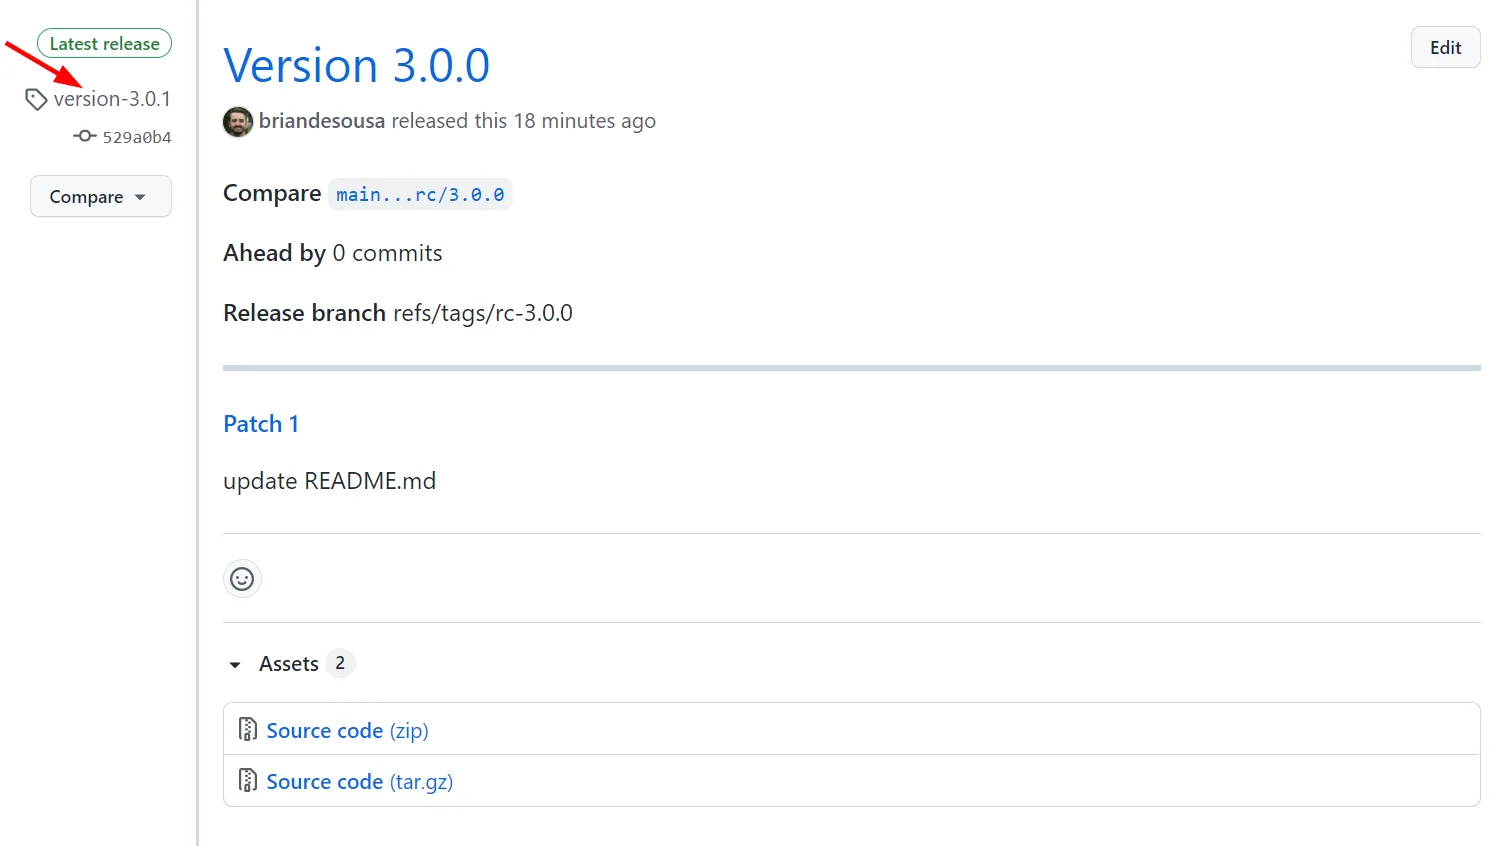
Patch a release or release candidate. This feature allows you to create a new patch release by selecting one or more commits that are not present on the latest release version. Selected commits are cherry-picked onto the release branch and then a new Git tag is created for the patch release:
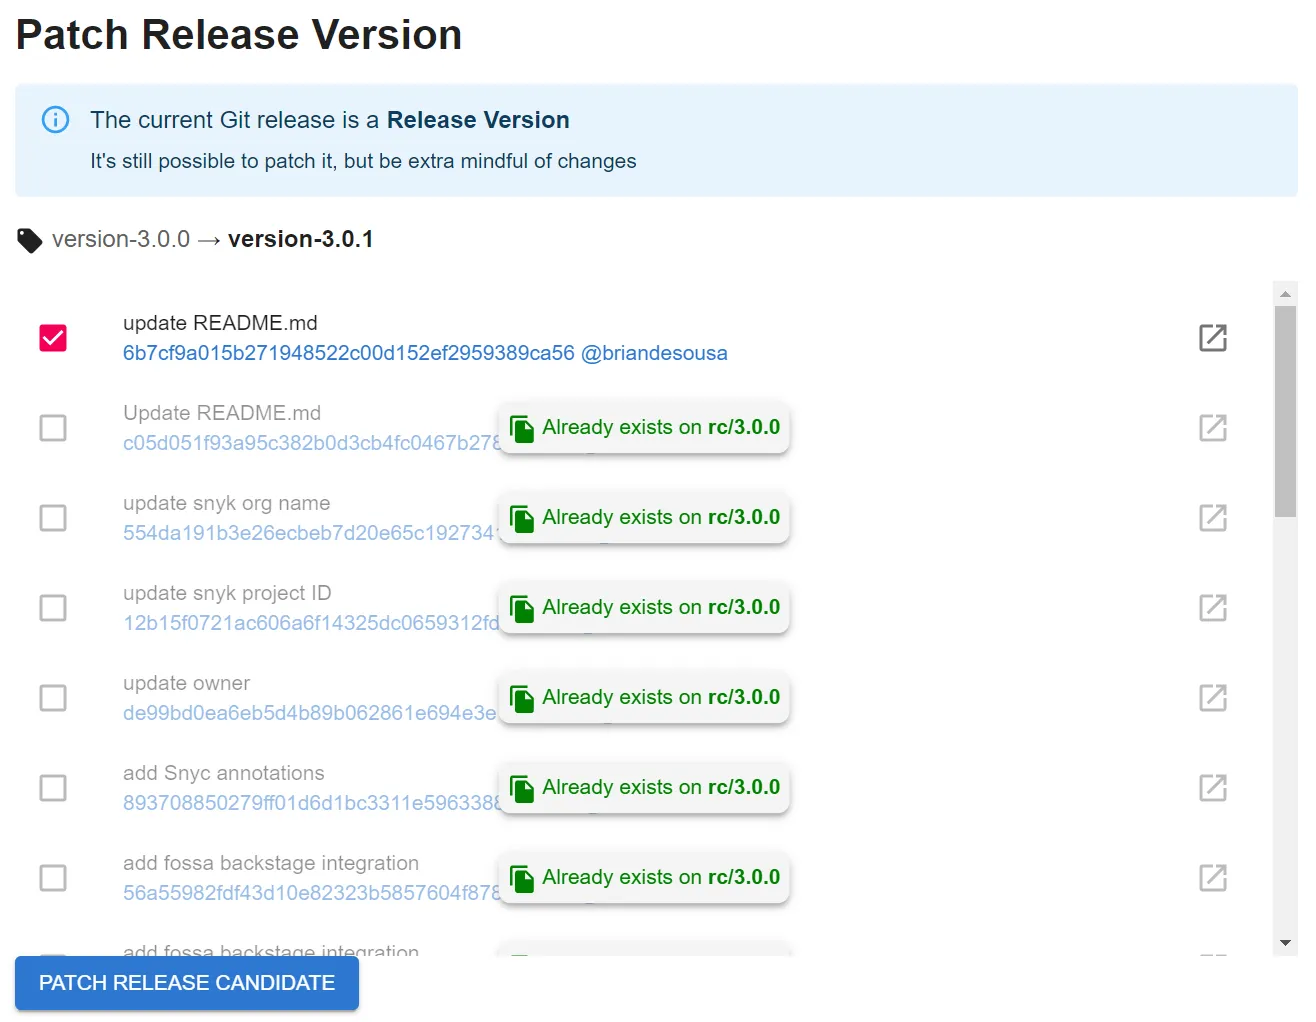
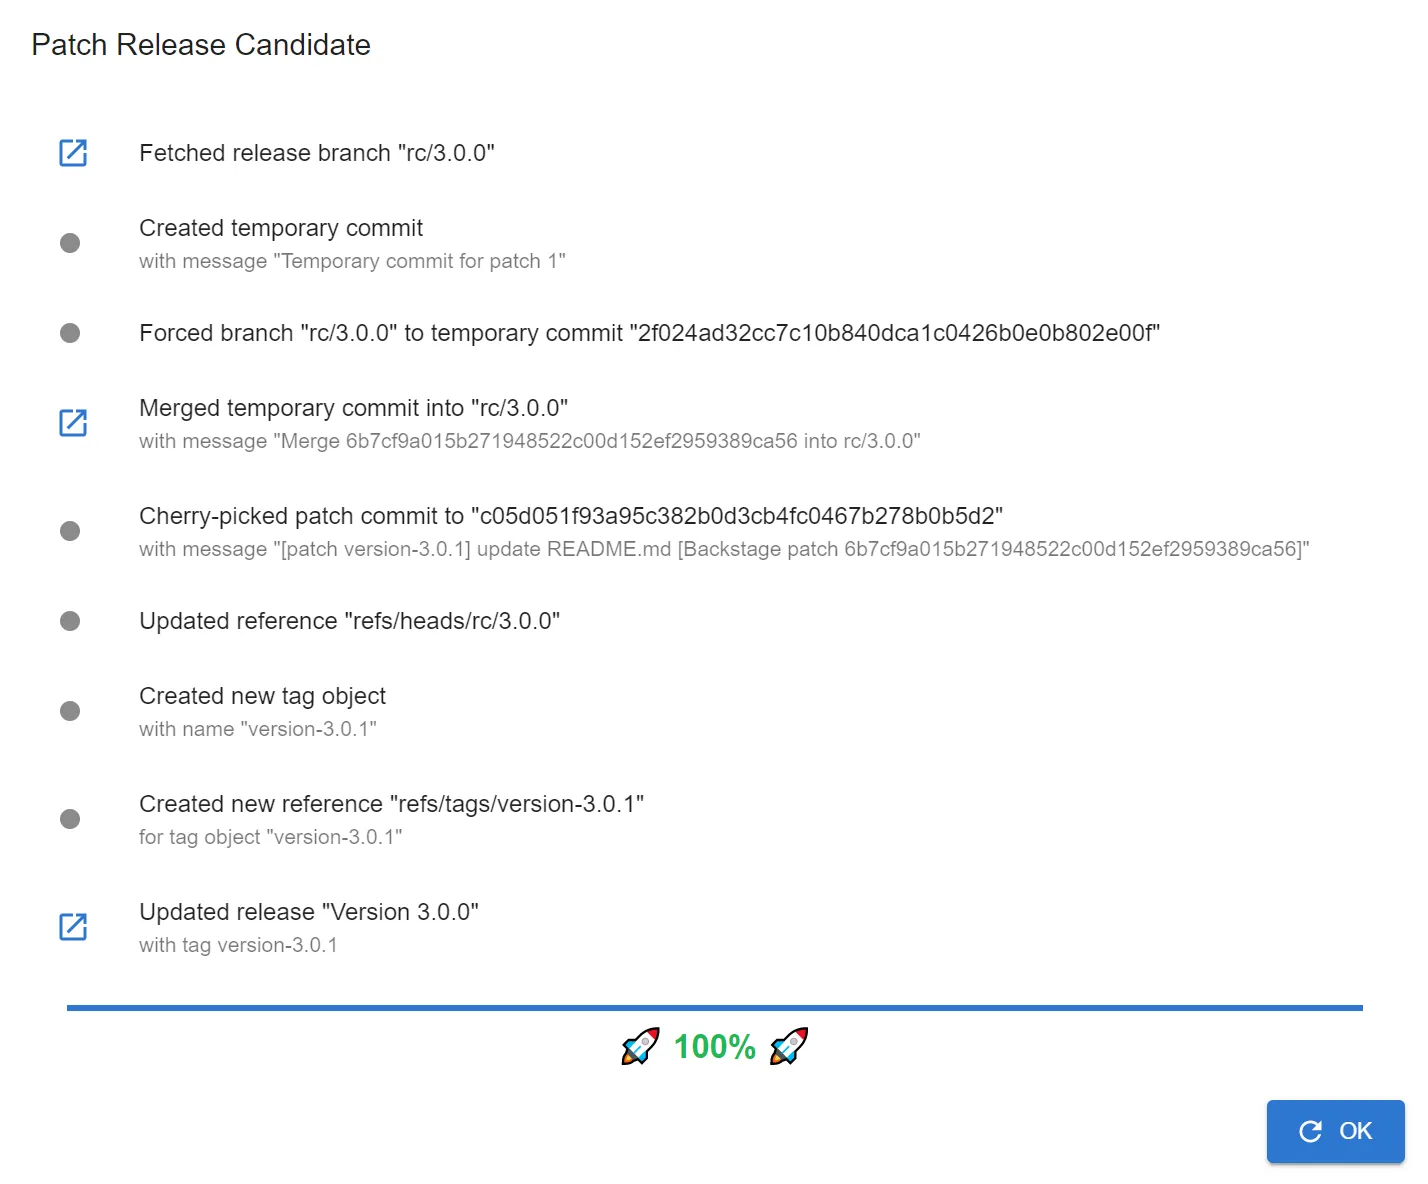
The GitHub release is updated as well:


There is also a helpful Stats view that displays a summary of your releases:

Git Tag Naming Convention Requirements
In order to effectively use this plugin to manage your releases, you will need to follow a specific set of naming conventions. These conventions are documented right on Git Release Manager page itself. In summary:
- If using the Semantic versioning strategy, your repository must have Git tags that match the
version-1.0.0(starting point for release candidates) andrc-1.0.0(starting point for release versions) naming conventions. The plugin will only allow you to create a release candidate from tags that follow these conventions. - If using the Calendar versioning strategy, your repository must have Git tags that match the
version-2021.01.30_1(starting point for release candidates) orrc-2021.01.30_1(starting point for release versions) naming conventions. This strategy expects release names to contain a date and incremental build number.
Customization
The GitReleaseManagerPage component can be customized by setting the component's optional props.
You can pre-select the versioning strategy, owner and repository. This will prefill all inputs and make them read-only. This might be useful if you want to expose repository-specific release manager endpoints. Keep in mind that users must have access to the Git repository otherwise they will be presented with a permission error.
<GitReleaseManagerPage
  project={{
    owner: 'briandesousa',
    repo: 'backstage-sample-service',
    versioningStrategy: 'semver',
  }}
/>

You can selectively hide sections of the Git Release Manager page:
<GitReleaseManagerPage
  features={{
    createRc: {
      omit: true
    },
    promoteRc: {
      omit: true
    },
    patch: {
      omit: true
    }
  }}
/>
You can build custom behaviors that are triggered after a release candidate, version or patch is created:
<GitReleaseManagerPage
  features={{
    createRc: {
      onSuccess: args => console.log('Release candidate created successfully, args: ' + JSON.stringify(args, null, 2))
    },
    promoteRc: {
      onSuccess: args => console.log('Release candidate promoted successfully, args: ' + JSON.stringify(args, null, 2))
    },
    patch: {
      onSuccess: args => console.log('Release patched successfully, args: ' + JSON.stringify(args, null, 2))
    }
  }}
/>
You can add your own custom content to the Git Release Manager page too. Use the args object to access data about your release.
<GitReleaseManagerPage
  features={{
    custom: {
      factory: args => {
        return (
          <Box style={{padding: '20px'}}>
            <Typography variant="h4">Release instructions</Typography>
            <p>Don't forget to do this when releasing this component...</p>
          </Box>
        )
      }
    }
  }}
/>

Changelog
This changelog is produced from commits made to the GitHub Release Manager plugin since over 1 year ago. It may not contain information about all commits. Releases and version bumps are intentionally omitted. This changelog is generated by AI.
Set up Backstage in minutes with Roadie
Focus on using Backstage, rather than building and maintaining it.